2/7/21

First serious use of engine heating pads

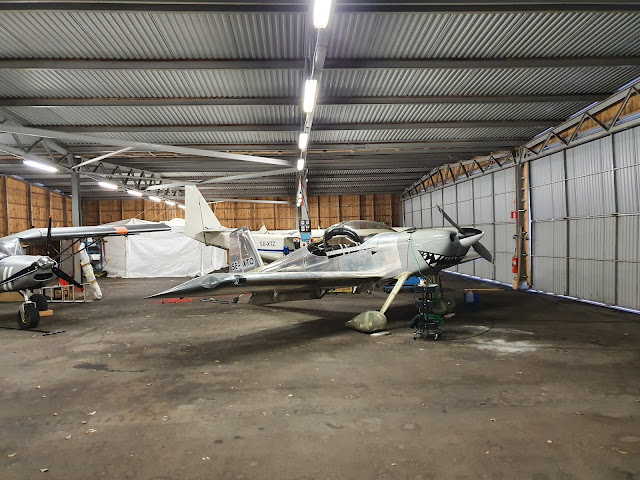
On this Friday evening I went to the airport and turned on my permanently mounted heat pads (From Vans aircraft, 2x100w heater pads) that I have glued onto the oil pan, in preparation for the expected flight on Saturday. 

I turned on the heater at 18:00, it was then 10F/-12C in the hangar. At 11:00 the following day, the temperature in the hangar was 12F/-11C and the engine oil temperature was at 60F/15.5C and CHTs was also up to about 56F/13C. 

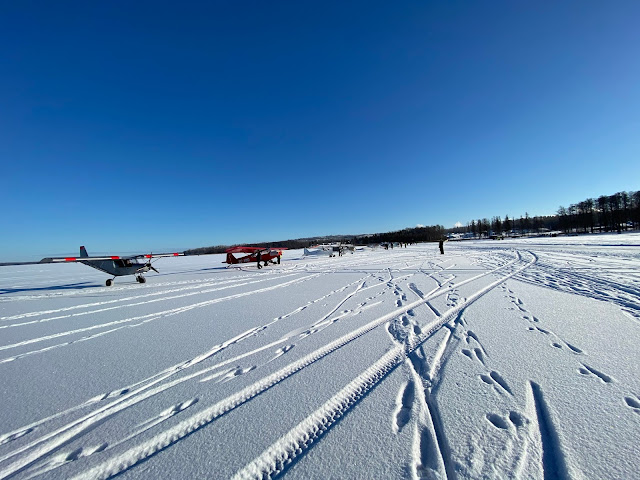
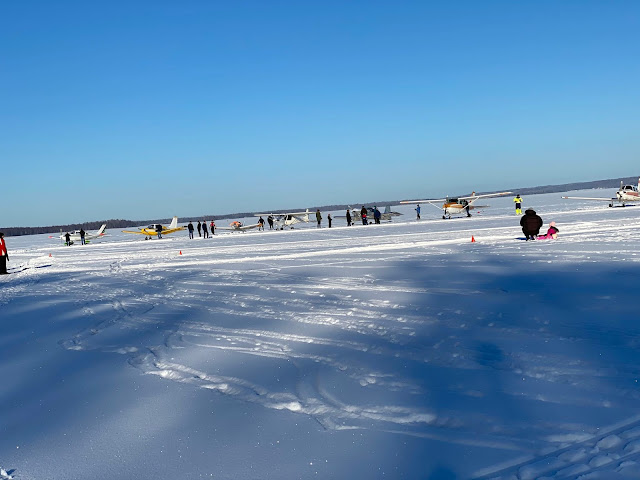
I then flew to a great little fly-in on a lake about 40 minutes of flight away. 21 aircraft visited, got a great cup of coffee and a typical Swedish cinnamon bun, life was great :D

Many pictures taken of my RV :D


1/14/21

Oil and oil filter exchange

 A few days ago, the weather was finally good enough for a flight to warm up the oil, after the flight I exchanged the oil while the engine was still warm. Hassle free and nothing special to report. At that time I had not yet received new oil filters so that had to wait.


Last night I got around to changing the oil filter. Temperature was just below freezing inside the hangar, the cold temperature is actually helping when exchanging the filter as the slow flowing oil makes it easier to change the filter without getting a lot of oil splilled out in the engine room. I also used the good tip of first loosening up the filter and then wrapping the filer with a plastic bag before completly removing it. 


Now the engine awaits the next flight with a new filter and Phillips 66 X/C 20W-50 oil in the sump.
Today I received an extension cord making it a lot easier to use the engine heater before flight. 


12/31/20

Radio flight tested OK :D

 Finally some good (well not good but in an IFR capable machine there was plenty of room for worse without affecting saftey).

Needed to set the intercom squelch level to the max 30 setting to keep the mics from staying open. The ICOM220-Sennheizer combo seems to be a bit tricky.


Great to have a fully working RV again :D

ps. this was my first flight using the checklist in the iPad. Not perfect as I would like to keep the chart/map in that screen. Once I find the screen rotate setting on my phone, I will try using that for the checklist.


12/30/20

Reinstalled the Radio

Received the radio yesterday. Today I installed it and did a good ground check (it was snowing with a cealing of 3-400 feet so I did not perform a flight test today.

Great to read that the found an obvious problem and solved it :D

The intercom and G3X sound good, receiving from a handheld radio also checked out good and receiveing on the handheld from the reinstalled ICOM also sounded good. 

Expect to need to tweak the mic gain and squelch in the air to get the best result. 


12/13/20

Brake fluid refill

I am still waiting for my repaired radio. I have a handheld radio and on weekends there is no formal requirement for a radio at my field so had the weather cooperated, I would have flown this weekend.

I was at the field on both Saturday and Sunday, On Saturday I made a checkout as the aircraft has not flown in over a month, 

I noticed that I have gotten some air into the brake lines, I remember that I only had brake fluid enough to barley get any fluid into the reservoir, apparently the cold temperature and around 18 months of leakage has emptied what was in the reservoir. 

Today I filled the reservoir to 75%.


10/25/20

Radio failure (on the ground)

 Lousy weather but good enough for a short IFR flight. The goal was to confirm or adjust the Intercom squelch level in preparation for a planned flight with my wife next week. The radio just died during the run-up while programming the GTN....


At least it is the best season to be grounded on...

10/24/20

LEMO-jack

Got around to installing the LEMO-jack for the right side. I decided to keep the traditional headset jacks as a backup. I also found the intercom squelch settings, now working perfectly on the ground, I hope to do a flight test tomorrow. 


10/15/20

It just works

 A flight from last week that shows my confidence in the RV. An RNP aproach in actual IMC conditions.


10/6/20

Radio working properly :D

Last evening provided some great weather. I took the oppourtunity and made an early evening flight. On my last flight I made some radio checks with a tower and got the response that reception is fully understandable (even at significant distance) but that it sounded like I was flying in an open cockpit aeroplane.

For last evenings flight, I had reduced the mic gain setting a lot, now I need to keep my mouth really close to the mic to break squelch but I got only positive feedback regarding my transmission quality. Finally a fully working radio, I will try to increase the mic gain sligtly but now I know I have a setting that works in case this recreates the noice problems. :D

I got a nice picture from my area, the pool will be installed this week.


9/15/20

Done!

Just got the message that att my paperwork is approved and that my flight permit is signed. All paperwork and my original POH will be shipped today and I will receice a copy on email soon.

This will not the the end of this build blog but updates will consentrate on changes to the RV. Most of my presence will from now on be on Youtube and Facebook.

RV-14 youtube playlist


9/13/20

TOGA button installed

Decided to yet again redo some radio wiring, I will shorten the headset wiring by placing the jacks in the panel instead of the standard RV-14 position (beside the seats). This is still work in progress as I did not bring all needed tools to the airport.

I also installed the TOGA switch and configured the GTN 625 for "remote go around", works great.


9/6/20

Playing around and tinkering

Got an email from our EAA-flight operations manager that my manual is approved now and that he has requested to have the paper original printed. Hopefully he will receive the original tomorrow for final signing :D

I think all the other paperwork is also ok. so I hope I can receive the permit to fly in not to many days...

I try to fly at least weekly, having some fun:


I am also tinkering with some nice to have things like the TOGA button. (single pole but separated by diods, one will go to the 507 TOGA input and one to the GTN 625)


8/17/20

Final inspection

Made a slow 15 minute flight from my home base to ESSE close to Stockholm for the inspection.

Misjudged the height on landing and made my biggest jump so far. The RV-14 might be a little bit bouncy but at the same time very stable even when mistreated like this :)

I'll post a movie later, it's on yourube already. 

The inspection went well, all signs in place and my small paperwork errors could be corrected on site :) The aircraft looks great, before the flight I found the loose screw that made my right fuel tank sender giving me intermittently faulty readings

8/13/20

Final inspection scheduled

Final inspection is planned to be carried out this Sunday. Paperwork and application for the permanent permit to fly was delivered last week.

Isn´t it funny how spelling mistakes and other small errors just pops out after you have delivered the material. I already have an updated verion of my POH but will wait to get that one approved until I have some substantial improvements.

I have one remaining problem, but I hope it will be considered an operational issue and not an issue for certification. What is missing it an "alternate static" valve. Only needed for IFR operation. I do intend to install one ASAP but have not found a good valve yet so it will probably not be installed during the inspection.


8/3/20

Panel version 3, mandatory extra annual in preparation for permanent permit to fly, started

Ordered some expensive but nice looking printed aluminium pieces for marking the switches and breakers.
Some screws are missing as they needed to be replaced, the Seat heat switch is not connected and installed and the same is thru for the TOGA button. Apart from that I can present the third version of the panel below:

Do not worry, the mag switches were just temporary hot while torquing the nuts.

The engine compartment part of the annual is done, some anti-chaffing improvements, all looks good. Still not enough rubbing from the baffling to clearly see where one should add some epoxy protection on the cowls. Probably at next annual.


7/30/20

50 Hours done

Another fuel calibration and two more flights and I am up to the necessary 50 hours :D
POH and test protocols are written. 

Left to do is:
- a mandatory extra annual/100-inspection
- mark all the switches again (ordered small 20x10mm signs yesterday. Before placing these, I will paint the center and right panel as I liked how the left panel turned out)

Then I will send in my material and request for a permanent permit to fly, our EAA organisation will send out an inspector to do a final certification inspection and then it will be done.

7/24/20

RV formation and left fuel tank calibration

Got a visit from fellow RV builder Calle, joined him an his daughter on the first part of their flight from Eskilstuna to HÃ¥tuna. To bumpy for close formation.

After that I flew around for another 35 minutes and then made turns in a good area near Katrineholm airstrip at 3000 ft AGL, waiting for the left tank to run dry. Spotted the fuel pressure going down from 28 to 18 before the engine really quit making power. Switched to the right tank and stayed in the area for another 30 seconds to make sure all was fine and then returned to Eskilstuna and did the fuel calibration by first calibration for ground at 0L, then put it in flight attitude and calibrated for 0L.

Then fueled up to 5, 10, 20, 30, 40, 50, 60, 70, 80 and finally 90L. Storing calibration points after each fuel up.

My radio transmissions and reception looks to be good now, while at Katrineholm, I could hear Calle who was probably pretty far away, activating his flight plan and getting the first clearances towards Visby. 

7/21/20

Morning aerobatics

Set the alarm for 4:25 AM. Airborne at 5:35...

The plan was to first do a one turn spinn and if that went well, a 2-3 turn spinn. What happened was that at the break my body shifted about an inch forward, bumping the stick so the spin almost automatically stopped. As my stomach started to tell me that I had enough of aerobatics for the flight, I decided that that was a good enough test of spinns.

Continued with an hour long flight, flew over my first airfield ESCN (Tullinge) and made a simulated approach to the old runway 24, care full of not getting to low as the have build houses on the old runway :(
The RV14 now has 43.1 hours in the air and the draft POH is almost done.

7/19/20

Fuel flow calibration

Another longer flight to verify fuel flow calculation (my red cube looks to be just about perfect) without any adjustments.

Finally got som IMC done and also tried out making a hold at a waypoint. Sure is easier on a GTN than on a an older 430 :D

7/14/20

1000 Hours

Another great flight today. This evening i realized that I had 997.6 hours in my logbook. Time for a longer flight!

And an amazing flight it was, started with some formation flying, then 30 minutes of IMC followed by a tour around ESSB (Bromma) control zone, got 2.5 hours block time so my total flight time is now 1000.1 hours :D Tested in the flight was the new iPad min flush mount, worked great!

Update: another video for nerds only, now that I got the external camera home:


Flight 43 and new place for the iPad mini

Another video, trying out some pic in pic video layouts:
The flush iPad mount will not fit next to the 7´´ G3X Touch screen without major modifications. I give up and will place it next to the G5 instead. Removed the left panel after the flight, at home with me now for the mount installation.

7/12/20

A morning flight, Flight 42

Sat myself in the car a few minutes after 5am and headed for the airport. Block off at 6:03 and airborne at 6:14, living closer to the airport is great! I am now in the air before I would have arrived at the airport if living at my old adress :D

Today's flight was just a another flight to verify that the G5 works as it should. My radio interception is now much improved and I listened to Sweden Control for most of the flight, happy to hear some traffic again, it sure has been silent on the radio for many weeks now.

I was hoping to do some IMC flying but I am not sure the cloud flying I did at the end of this video even qualifies for logging IMC... When flying in IMC with the pitot heat on at 11 degrees Celsius with all normal equipment on and a camera on the USB interface, my total system draw is only 15 Amps. Flying at -40 celsius should make the GAP 26 draw a maximum of another 6 amps, feels great to have lots of marginal :D

Was home at 8:05 the kids had just woken up and my wife's greeting included "...perfect tajming, the coffee is just ready to be served". Life is great!
  

To-do/squak list

Done
- Install Garmin G5
- Wrap center panel
- Clean up the wiring behind the panel (some minor stuff left to do)
- Fix/replace the non working canopy fan

To-do
- Install new TOGA switch
- Re-label the center panel
- Forgot mounting the light regulators in the panel, a 5 minute job
- Connect the canopy warning switch (not sure if I will)
- Provide a USB connector at, at least one external camera postions
- Install the new access doors/covers
- Install Wheelpant access doors (to be able to fill up the tires without having to dismantle the fairings)
- Install flush iPad mini holder in the panel

7/8/20

Twilight flight, panel version 2.5

Spent many hours with improving the wire management, wrapping the center panel section and installing the new Garmin G5. Below is panel version 2.5 (version three will be with the soon to be installed iPad flush mount)
 I was tired and local time was way past 10PM but I could not skip testing out the G5 and this was also a great opportunity to check the landing light height adjustment.

Twilight ended at 23:26 at ESSU last night, I landed at 23:16, perfect! This was also the first flight with a working pitot heat. I turned off the heat when vacating the runway, it was still warm 6-8 minutes later when I had gotten out of the cockpit and checked it.
I need to tune the back light settings in the GMC507 and the ICOM. In real life, it is the G5, 625 and 470 that has a good brightness setting.
 

7/3/20

New toys for Panel version 3

Got this in the mail today :D
When installed I will feel comfortable flying into IMC.

Squak/to-do status:

Done
- Flip the flap switch
- Fix the co-pilot trim down switch
- Install Pitot heat switch (and breaker)
- Complete Pitot heat wiring
- New tail wheel axle
- New Tail wheel stearing link

- Connect the canopy fans, Done but one fan does not work...

To-do
- Install Garmin G5
- Install new TOGA switch
- Wrap center panel
- Connect the canopy warning switch (not sure if I will)
- Clean up the wiring behind the panel
- Provide a USB connector at, at least one external camera postions
- Install the new access doors/covers
- Install Wheelpant access doors (to be able to fill up the tires without having to dismantle the fairings)
- Install flush iPad mini holder in the panel

6/28/20

Flight 38-39, no more ugly chains!

While I like loose chains when landing, I decided to replace the ugly (and draggy?) chains that keep the rudder and tail-wheel connected with a much neater solution. I also changed out the axle bolt for an axle that allows you to use a Cessna type tow bar.

I have now tested landing with about 6kt crosswind, to taxi is great and I felt no jinx when the tail wheel touched down.I have also used a tow-bar to drag the RV-14 100m to the cleaning place, some day I will make or buy a motorized towing solution!

6/25/20

Flight 36, expanding the envelope

Another great flight. During the pre-flight I took greater care than usual to make sure that all stuff in the RV was secured or put back in the hangar.

As I already have the basic data needed for Version 1 of the POH/Flight manual, it is time to start thinking about less essential things to verify. One of these things is to test some basic aerobatic maneuvers.

I don´t plan on doing any competition aerobatics or other types of advanced flying, I do not have a fuel pickup that can handle negative Gs, nor an oil system capable of sustained inverted flight.

I decided to start with two of the most classic maneuvers, the barrel roll and looping.

After reading about other RV-14/A pilots doing aerobatics in this model, I decided to follow their suggestion and use a higher speed than what I think I will use when more experienced in this aircraft. This means using 155-160kt IAS as entry speeds for these two maneuvers. It is stated that one does not have to use the normal IAC 4G pull for the looping entry and pull out (less is ok), 4G was anyway what I aimed for.

Reviewing the log shows that my feel for G forces are not way off but not great either, during the entry pull i maxed at 4.88G and for the pull out I used  a max of 3.79G. Other interesting numbers is that I left the looping at only 100 feet below the entry alt and my speed only dropped 3 knots. The top was about 800 feet above the baseline, max/min vertical speed was 9670/-10232, all these figures are from the 1/s G3X log, I will review the internal faster updating log later.

The left and right barrel rolls was done by doing 2G pull up to place my shoes at the horizon and then about 75% aileron inputs while maintaining between 0.5 and 1 positive G. No rudder inputs (at least not deliberate) was made. during the rolls, the altitude went up by 165 and down by 134 feet compared to the starting altitude. Logs are great to have!

My external camera got tilted, I made the best of it :/


6/21/20

Flight 35, Fans

Today I finally got around to connect the two fans that wents the avionics and also help with getting fog of the canopy.

I also fixed the co-pilot trim up function, as last time it was the micro molex connector that had come loose. Last thing done was to set some squelch and mic gain, and other settings in the ICOM220.

Fueled the aircraft and then washed it for the first time. Take off video with the cleaned RV:


6/19/20

Flight 34, Fixed radio

Got out to the airport to continue dismantling the radio, I got out the tray and decided to just try it in my lap before removing all wiring. I then realized that I could push the radio in another millimeter into the tray compared to when it was in the panel! Now I got reception from inside the hangar :D

I then tried turning on the intercom using the key on the radio (hold in dual for 2 seconds), I had not done this before as I have a dedicated intercom switch, another win, the intercom is working.

With this, I reconnected the G3X sound into the radio, mounted the tray into the panel, further out and went for a test flight. I am still not happy with the sound quality but everything is much improved.


Made two touch & go, all three landnings was good today, basically no bounce on any.


6/18/20

Certificate of Environmental Quality - Noise

Received my "noice certification" today, passed :D

This was done according to ICAO Annex 16 chapter 10.

I know some european CAAs allow reuse of tests from the same aircraft/engine/propeller combination.

Contact me if you have any use of my test and I will happlily send you a copy of my certifiate and test protokolls.

RV-14 with a YIO-390 engine and a 74¨ Hartzell C/S prop @ an MTOW of 930 kilograms.

6/14/20

Noise certification test

Flights 30-32

Flew to ESKU Sunne for the noise certification test. When I review the track I can clearly see that I was not cheating. I was both low, slow and initiated the climb late.
 Consistent paths :D
Could have initiated the climb about 10m earlier :/

My radio problems are back, I am planning to make a new harness without reusing any of the old wiring.

6/7/20

New panel center section

The plan for yesterday was to get the noice certification tests done but the weather did not cooperate.

I then decided to install the new center section of the panel so I would no longer have to fly with the GMC 507 autopilot controller in my lap.
I managed to flip the flap switch upside down so I will have to correct that at the next session.

A squak/to-do list to make me remember:
- Flip the flap switch
- Wrap the center panel
- Label the center panel
- Fix the co-pilot trim down switch
- Connect the canopy fans
- Connect the canopy warning switch
- Install the Pitot heat switch
- Clean up the wiring behind the panel
- Provide a USB connector at, at least one external camera postions
- Install the new tail wheel axle
- Install te new tail wheel staring link
- Install the new access doors/covers

6/2/20

Flight 25, 26, 27 Airspeed verification

Flight 25 was a flight to verify that all still worked well after the annual service including oil/oil filter change. During this flight I also did some cardinal heading&track runs at 4000 feet to use for airspeed indication verification.

Flight 26 was a familirazation flight for my second observer and controller Jan-Erik. After the upcoming noise certification tests, I need to focus on solving the intercom problem.

Flight 27 was a great evening flight, I got a rainbow on camera, it looked much greater live. I also adjusted the autopilot, I made a small increase both in gain and torque, getting nearer to what I consider perfect. 


Yesterday I got around to enter the data from flight 25 into the excel sheet provided in Kitplanes to help calculate IAS correction. The result was an amazing -0.29 knots!


5/25/20

What a mess, flight 23&24

Another appointment was cancelled so I got some time for myself. What better use of this than taking two flights and then change the oil?

It was really bumpy in the air, the autopilot performed great in the turbulent air. 


After the flight I removed the cowling and got an even better look at the pressure sensors as part of performing the new Vans/Garmin service bulletin, mine are definitely leak free :D

After that I lifted the tail, placed the bucket and removed the oil plug. I was just about to congratulate myself and take a picture of the oil going into the bucket, when it started to spill. At first it flowed straight out of the opening and into the center of the bucket, then it starter running from the back side of the hole and onto the air intakes and then down to the side of the bucket, what a mess!

5/19/20

HÃ¥tuna Flight 21 & 22

First grass landing. Why sit in the car for at least three hours when you can make two short flights instead to buy oil and filter for the last part of the annual.
 Not the easiest strip to land at but with a 4 knot cross wind resulting in a possibility to land uphill and take of downhill could not be passed.

I am also done with the Vans/Garmin/Kavilco service bulletin. Perhaps I will exchange the sensors later on but for now they are fine.

Flight 20 Noise test training

Flight 20 was a flight to train for the upcoming noise certification test. For the pilot, the test is mainly about performing several repeatable max performance climbs.

What I did was to set the autopilot in FD (flight director) mode already on the ground, with the runway heading set as the horizontal mode and IAS climb at Vy spped.

I then started, established myself in the expected attitude and turned on the autopilot who then smoothly fine tuned the climb until my set altitude of 1500 feet (for the test I will climb higher.

Test was very successful. I also made two landing where I set to land just at the numbers, I could easily stop within 300m of the numbers and I touched down within 25 meters of my target.
 

5/15/20

Autopilot installation, flight test

Finally everything lined up and I could perform the autopilot testing. I could not get the trim to work properly thru the autopilot but as it is recommended to do the first test without autotrim, I performed the other ground tests, disabled the autotrim function and then went flying.

First I flew around with just the flight director enabled, after being satisfied that it guided me correctly I climbed to safe altitude.

At 3000 feet I had one finger on the cws/ap disconnect button, the other at the AP controller, I took special care to where the AP servo breaker was and then activated the autopilot. At first I just had it in heading and alt mode. verified that I could disable the AP with a push on the AP/CWS button on my stick.

I then tried some turns just turning the heading knob, did some VS climbs and descends, happy that it captured my set altitude. With these tests done, I flew with less concerns and got down lower.


I have now done altitude captures from high and low, altitude hold directly. only done VS climb and descents so far. For the horizontal part, I have done heading and nav from the GTN625.

All have worked great. The autopilot is precise and very smooth, I think I will set it to be a little more aggressive later on, but for a first test with just the recommended values from Vans I think the result was amazing. It is already better that 90% of all other autopilot equipped aircrafts I have flown :D

5/7/20

Autopilot installation, wiring almost done

Sorry for the lack of updates.

Not only have me and my family moved to a new house this spring, I have also been more busy at work due to covid-19. And as if that was not enough to shift my focus away from the RV, I have started a new demanding position at another company this monday.

This evening I finally found time to continue my autopilot installation. At first it was a complete mess, the roll servo did not even show up on the configuration screen and the rest of the system showed huge amounts of canbus network error:
It stayed like this for weeks, I did some improvements in my wiring, installed a shielding ground but nothing helped.

I began suspecting that it was a canbus termination problem as the instructions from Vans did not clearly indicate that the servo harness was designed so that pin 3&4 on the servos were connected (this makes the servos use the built in 120ohm canbus terminators)

After posting on the Vansairforce forum this afternoon, I quickly got some trouble shooting assistance and this evening I went to the hangar to check.

I could quickly determine that the canbus termination was as specified. I then disconnected the roll servo as that LRU showed the biggest problem (not showing up at all)
With the roll servo disconnected, the bus was fine again. I went back to my documentation and after reading the relevant documentation several times and scratching my head, I finally found my error. Due to this mistake in my documentation, I had switched the can-hi and can-low wires.

After redoing this part of the wiring harness, I was presented with this pleasing screen:
 Time to put everything together, set some values in the configuration and go out testing...perhaps on Sunday.

3/29/20

Flight 17&18 AOA and apch

Two more flights done, the spring weather has been much better so far, compared to the lousy fall and winter weather.

I have now done a full AOA calibration and during the last flight I tried a GPS assisted NDB-NDB apch.

3/22/20

Flight 16, a "Q-moment"

Did flight 16 today in an amazing blue sky with light winds. Some minor turbulence but all in all a very enjoyable flight.

There was some spice in the beginning. I used the heating pads to give the oil a better starting point, in was about -6c when I arrived at the airport, +4 when I left. After a normal preflight, start and all the normal taxi, run-up and take-off, I leveled out at 1500 (1400agl) and quickly accelerated, the stick force got heavier and heavier until I realized the trim acted in the opposite way.

Only thing done since last flight is installing the pitch autopilot servo. So be aware that when installing the autopilot servo, the trim might reverse. (the trim commands goes thru the AP-servo)

In the cozy3 that I am a part owner in, we actually have the trim set opposite to normal so adjusting to having the pitch trim going against the stick movement was no problem at all.

I had forgotten that I had the gopro set in pro-mode with iso min-max set for low light mode, all footage outside of the hangar was completely washed out.

3/8/20

Tail cover in place again

The tail cover plate with it´s new EXPERIMENTAL sign is in place again. More import is that behind the cover, there is a fully installed pitch servo.

None of the servos have their wiring done. I have not decided on how to do the can-bus connection. One alternative I am thinking about is to have one end of the chain start at the pitch servo i the tail, going to the Magnetometer in the left wing, from there to all the LRUs in the panel and then ending at the roll servo in the right wing. Another is to keep one end being at the Magnetometer, going to the panel LRUs, from there to the roll servo and from there to the pitch servo.

3/7/20

Pitch servo

Pitch servo in place, The actuator arm and the cables are to be done... 

2/29/20

Flight 15

Another beautiful flight over a snow covered landscape. I sorted out a GPS-EFIS problem that have haunted me for many months. I could not get the flightplans to transfer.
The problem was that while I correctly had only the PFD active in the G3X settings, I somehow managed to have an RS232 setting active for the non-existing MFD. This non-existing MFD got priority over the PFD from the GTN625 resulting in that I got no MapMX communication between the boxes.
After the flight I removed the tail area cover and last night I made a more permanent "Experimental" marking.

2/22/20

Roll Servo

Either it is to windy or cloud cover below 1000 feet. Not conditions I am willing to fly my RV in at this stage of the flight test period.

The hangar is cold but I have been there a few times, checking things out and I have finally gotten the roll-servo in place. Roll trim still works, good to know that the servo does not need power for the trim commands to be relayed.

I hope to get it connected during my next session. It is now almost exactly one months until me and my family will move to a new little city/suburb. This will turn my 1:15 one way drive to the airport into a 28-33 minute drive :D

2/2/20

Status early 2020

I did one uneventful flight in mid January, 12.8 hours in the air so far.

Today was a good day to visit the airport but the wind was strong, 90 degrees across the runway and getting more and more gusty by the minute so I decided to stay in the hangar and check/fix/improve instead.

Task one was to attach the list for the glareshield. looks great, took five minutes to install and costed less than 10$ including freight :)  
 Then I removed the cowling and checked everything over. Found no new problems. I will probably reroute the heater cable/contact before next flight.

Last physical task was removing the right wing drain that has a very slow leak. I managed to remove it, lose less than 1 gallon of fuel while inspecting it, finding and removing a small string of proseal that was preventing the o-ring to fully seal, make a quick cleaning of the treads and then reattaching the drain. I have no new sealant on the treads, will check for leakage but I saw no leak for the few minutes that I looked for it.
Finished of with updating the software version of my GTN625 and the databases in my G3X system.

I looked at the cylinder 1 EGT sensor wire but I did not have the necessary tools to really check it out.

12/28/19

Flight 13, first flight below 0 centigrade

Beautiful day. This fall and so far the winter has had lousy flying weather so one have to use the opportunity when it occurs.

I have heat pads attached to the oil pan on my IO390 but I have no adapter from 110v to 240v so I have not been using it yet. Today it would have been good as the engine was difficult to start. (Around -4 centigrade on the ground)

My GoPros stopped shooting after about 10 minutes in the air.

I dialed in 23inch MP and 2100rpm, leaned just lop and got 140kt IAS at around 24l/h (6.5gph) :)

From the EFIS file: IAS 140kt, Engine power 46%, Fuelflow 6.4 gph, MAP 22.9, RPM 2110.


A video from the engine start and take off.

11/17/19

Flight 12, first climb performance test

Moved the RV to its new home today, lousy weather all day so just made the short flight while there was a short time window with a 1000 foot ceiling.

Tried out the "climb performance using level acceleration" as described by Nigel Speedy in a Kitplanes article, probably in the September 2018 issue. I cheated a little, did not climb to alt at low speed with full power, instead I slowed to 60kt and then faster than usual dialed in full power. As the results basically confirmed the numbers from Vans I call this solution acceptable but I will validate on later flight using the more correct method.


10/27/19

Flight 11

Finally another flight. I planned to start the autopilot installation but I had forgotten to bring the plans.

It was also very cold in the hangar so I settled for exchanging the masters switch to the type that you have to pull over the center. I also installed two USB ports on the right panel. No video or pictures from this flight.

Did another lean test:

FF 7.9gph / 29.9lph
TAS 155
RPM 2150 MAP 25.5 Engine power according to G3X 56%

Landed with the highest crosswind so far: 11kt, 70 degrees from the side.

9/22/19

Flight 10, radio check

Bad weather, a one week business trip... today it was finally time to verify that the radio is working. Last week I finalized reinstalling a completely new cable harness for the radio. It sounded good on the ground but I did not have time to take a flight that day.

Today I arrived at around 10, taxied to the fuel station and performed a successful radio check with the tower. With a general cloud base of 1100-1200 feet and with small clouds even lower, I decided to park the RV in the hangar again and go for lunch.

After lunch the cloud base was now at 1400+ and I decided to fly. I was asked to take the grass strip, and why not so that was another first for the aircraft. The radio worked great so I flew over the construction site of our new house. The I decided to calibrate the AOA, I was a little bumpy and I could not fly higher than 16-1700 feet so I did not insist on a crisp stall, will redo it in smoother air and with some ballast in the back. lowest IAS was 57.6kt according to the logs.


9/7/19

Panel version 2

Started on the next version of the Panel. I think climbing with the AP set on IAS will become my favourite.

8/30/19

Status of the squawk and to-do list as I approach 10 hours

The list

New:
- Another go at the Radio wiring

Done:
- Finish the paper work
- Paint the last three letters of the registration marks (the vinyl came loose)
- Wire the elevator trim correctly
- make the flap switch move the flaps in the right direction
- Rewire the magnetometer
- Re-calibrate the magnetometer
- Validate all G3X green/yellow/red band settings
- Attach the wing walk spacers with the proper hardware
- Proof of Insurance, not sure what if anything was actually wrong but my insurance agent will send a new copy to the authorities.
- Corrected ELT information. I had mistakenly filled out the 15 digit HEX "serial number" of my ELT and not the 15 digit HEX ID number. After spending more than three hours searching for the documentation it was an easy fix. Turns out that I have posh looking folder for important RV documentation that I had forgot about ;)
- Prop cycle
- Verify/redo fuel tank sender calibration
- Used a to long screw while attaching the upper leg fairing resulting in that I unbonded the glassed in nut.
- Do something about the EGT/CHT and more wiring, I had no reading during the taxi today
- Solve the right stick trim down button not working
- Get the transponder working
- Fix the right upper gear fairing, glassed it in tonight, sanding planned for tomorrow
- Do something about the EGT/CHT and more wiring
- Another engine run with proper EGT/CHT reading and a short full power run.
- Install aileron trim
- Install tablet holder

Other things to be done soon but not preventing flight:
- Connect the landing light
- Install autopilot servos and AP controller
- Swap amp measurement cables, reading now shows negative when it in my view should show positive values
- Redo the fuel calibration again, something is not right, thinking about setting units to gallons and recalibrate in that unit
- EGT for cylinder one has an intermittent problem, will check the connector and sensor wiring


8/27/19

Flight 9, first leaning and another first

Radio problem persists but that´s for another post.

Yesterday I decided that the engine is probably broken in enough for me to be able to test some leaning. It works great, I can lean way past peak and continue until the engine has lost significant power without any vibrations.

On this first test I set up for 2305 RPM and set Manifold pressure for 65%. I then leaned until all cylinders are past peak and found a good spot at 30-90 degrees LOP. What I saw during the flight and have now verified after looking at the logs are:

146 kt IAS
158 kt TAS
8.0 GPH (30.24 liters per hour)
2305 RPM
24.6 MAP
57.5% power according to G3X
5200 Density altitude
OAT 14.15 C (57.47 F)

Please note that my airspeed indicator has not been verified reading correct yet but it is probably close.

The next was a life time first for me, I decided to run a tank dry. Partly because I wanted to experience it and partly because I wanted to empty the tank for a re-calibration of the fuel sensor.

I had read about what to expect and actually caught the slight drop in fuel pressure before the RPM started fluctuating. The pressure dropped from 27 to 16 under a 10 second period before the engine started to react.

For safety, I circled above a long runway at 4000 AGL just in case...


8/18/19

Flight 8, radio problems persists

Busy days so I have not gotten around to updating the blog until now. I flew again already on Thursday the 15th. Radio problem was actually worse, this time I could barley hear anything. Made the flight using a handheld radio.

Great flight otherwise.

Guess it it time to look at the connector on the radio side :/

In other news, my AP servos and autopilot controller have been shipped, I choose the low cost shipping so probably several days yet before they show up.

8/13/19

Dehumidifier

Almost done with my engine dehumidifier. Some RTV and some sort of connection to the oil refill tube and the case ventilation and I am done.

Air from the engine goes thru the large box into the bottom of the smaller box (that will be filled with reusable moisture absorbent material). The air then goes thru the holes in the small box lid, into the large box. This now much dryer air is sucked up by the aquarium pump, pushed thru the other hose back into the engine. This closed looped system results in that the air moisture content in the engine  quickly falls below the level were corrosion can occur. Very good for an engine when it might go weeks between flights in winter time.