The list
New:
- Another go at the Radio wiring
Done:
- Finish the paper work
- Paint the last three letters of the registration marks (the vinyl came loose)
- Wire the elevator trim correctly
- make the flap switch move the flaps in the right direction
- Rewire the magnetometer
- Re-calibrate the magnetometer
- Validate all G3X green/yellow/red band settings
- Attach the wing walk spacers with the proper hardware
- Proof of Insurance, not sure what if anything was actually wrong but my insurance agent will send a new copy to the authorities.
- Corrected ELT information. I had mistakenly filled out the 15 digit HEX "serial number" of my ELT and not the 15 digit HEX ID number. After spending more than three hours searching for the documentation it was an easy fix. Turns out that I have posh looking folder for important RV documentation that I had forgot about ;)
- Prop cycle
- Verify/redo fuel tank sender calibration
- Used a to long screw while attaching the upper leg fairing resulting in that I unbonded the glassed in nut.
- Do something about the EGT/CHT and more wiring, I had no reading during the taxi today
- Solve the right stick trim down button not working
- Get the transponder working
- Fix the right upper gear fairing, glassed it in tonight, sanding planned for tomorrow
- Do something about the EGT/CHT and more wiring
- Another engine run with proper EGT/CHT reading and a short full power run.
- Install aileron trim
- Install tablet holder
Other things to be done soon but not preventing flight:
- Connect the landing light
- Install autopilot servos and AP controller
- Swap amp measurement cables, reading now shows negative when it in my view should show positive values
- Redo the fuel calibration again, something is not right, thinking about setting units to gallons and recalibrate in that unit
- EGT for cylinder one has an intermittent problem, will check the connector and sensor wiring

8/27/19
Flight 9, first leaning and another first
Radio problem persists but that´s for another post.
Yesterday I decided that the engine is probably broken in enough for me to be able to test some leaning. It works great, I can lean way past peak and continue until the engine has lost significant power without any vibrations.
On this first test I set up for 2305 RPM and set Manifold pressure for 65%. I then leaned until all cylinders are past peak and found a good spot at 30-90 degrees LOP. What I saw during the flight and have now verified after looking at the logs are:
146 kt IAS
158 kt TAS
8.0 GPH (30.24 liters per hour)
2305 RPM
24.6 MAP
57.5% power according to G3X
5200 Density altitude
OAT 14.15 C (57.47 F)
Please note that my airspeed indicator has not been verified reading correct yet but it is probably close.
The next was a life time first for me, I decided to run a tank dry. Partly because I wanted to experience it and partly because I wanted to empty the tank for a re-calibration of the fuel sensor.
I had read about what to expect and actually caught the slight drop in fuel pressure before the RPM started fluctuating. The pressure dropped from 27 to 16 under a 10 second period before the engine started to react.
For safety, I circled above a long runway at 4000 AGL just in case...
Yesterday I decided that the engine is probably broken in enough for me to be able to test some leaning. It works great, I can lean way past peak and continue until the engine has lost significant power without any vibrations.
On this first test I set up for 2305 RPM and set Manifold pressure for 65%. I then leaned until all cylinders are past peak and found a good spot at 30-90 degrees LOP. What I saw during the flight and have now verified after looking at the logs are:
146 kt IAS
158 kt TAS
8.0 GPH (30.24 liters per hour)
2305 RPM
24.6 MAP
57.5% power according to G3X
5200 Density altitude
OAT 14.15 C (57.47 F)
Please note that my airspeed indicator has not been verified reading correct yet but it is probably close.
The next was a life time first for me, I decided to run a tank dry. Partly because I wanted to experience it and partly because I wanted to empty the tank for a re-calibration of the fuel sensor.
I had read about what to expect and actually caught the slight drop in fuel pressure before the RPM started fluctuating. The pressure dropped from 27 to 16 under a 10 second period before the engine started to react.
For safety, I circled above a long runway at 4000 AGL just in case...
8/18/19
Flight 8, radio problems persists
Busy days so I have not gotten around to updating the blog until now. I flew again already on Thursday the 15th. Radio problem was actually worse, this time I could barley hear anything. Made the flight using a handheld radio.
Great flight otherwise.
Guess it it time to look at the connector on the radio side :/
In other news, my AP servos and autopilot controller have been shipped, I choose the low cost shipping so probably several days yet before they show up.
Great flight otherwise.
Guess it it time to look at the connector on the radio side :/
In other news, my AP servos and autopilot controller have been shipped, I choose the low cost shipping so probably several days yet before they show up.
8/13/19
Dehumidifier

Air from the engine goes thru the large box into the bottom of the smaller box (that will be filled with reusable moisture absorbent material). The air then goes thru the holes in the small box lid, into the large box. This now much dryer air is sucked up by the aquarium pump, pushed thru the other hose back into the engine. This closed looped system results in that the air moisture content in the engine quickly falls below the level were corrosion can occur. Very good for an engine when it might go weeks between flights in winter time.
8/12/19
Cloudy and windy
Lots of thunder and lightning in the last couple of days. There have been plenty of breaks where flying would have been ok had it not been for that I have set a very conservative cross-wind limit on myself.
I will not do any planned landings with more than a 5kt cross wing component until I have had the chance to do some slow flight with the RV. And this will not happen until I am convinced that the initial break in is done.
I will not do any planned landings with more than a 5kt cross wing component until I have had the chance to do some slow flight with the RV. And this will not happen until I am convinced that the initial break in is done.
8/8/19
Removed PTT from the headset connectors
Last night I removed all the seat plate screws once again, there is at least 60 of them! And then removed the unneeded PTT wire from the headset connectors.
It was to late to test fly but it sounded good when sending from the RV and listening on the hand held. The plan is to fly on Saturday, If coms are ok I will fly to a fly-in, if not I will return to my home field and if needed use the hand held in the air for announcing my arrival to the then uncontrolled airfield.
It was to late to test fly but it sounded good when sending from the RV and listening on the hand held. The plan is to fly on Saturday, If coms are ok I will fly to a fly-in, if not I will return to my home field and if needed use the hand held in the air for announcing my arrival to the then uncontrolled airfield.
8/3/19
Another fix and flight 7
Solved the pilot ptt problem, as expected the problem was the dsub connector.
On the ground my transmissions were perfect but when returning to the field I basically transmitted static :(
I think the next step will be to replace another part of the Vans harness!
The flight was good, actually heard thunder and saw lightning in the distance during taxi and take off. Temps are good but still no noticeable drop in CHT temps. 7.2 hours airborne now. 30 minutes of yesterdays flight was a 2400rpm and with MP to keep the power between 75-80%. The rest at 2500rpm and 25-26 inch MP.
Decided to skip trying hard to make a three pointer and just to focus on getting a smooth landning, it became a great tail low landing, no bouncing and I could keep the tail wheel of the ground for more than 100m. With the taxi intersection 1000m from the threshold I could still make the turnoff without touching the brakes.
On the ground my transmissions were perfect but when returning to the field I basically transmitted static :(
I think the next step will be to replace another part of the Vans harness!
The flight was good, actually heard thunder and saw lightning in the distance during taxi and take off. Temps are good but still no noticeable drop in CHT temps. 7.2 hours airborne now. 30 minutes of yesterdays flight was a 2400rpm and with MP to keep the power between 75-80%. The rest at 2500rpm and 25-26 inch MP.
Decided to skip trying hard to make a three pointer and just to focus on getting a smooth landning, it became a great tail low landing, no bouncing and I could keep the tail wheel of the ground for more than 100m. With the taxi intersection 1000m from the threshold I could still make the turnoff without touching the brakes.
7/30/19
Headset work
So, I believed and hoped that I had made a wiring error.
Not so, my wiring was correct, the right wire was connected to the tip, barrel and ring. However, I had connected the jack as a stereo jack, believing that a stereo headset would not care about if you connected the left or right channel to radio. Not so, my headset seems to request that it gets an input on the tip/right channel.
I solved this by making a wire between the tip and ring on the headset jacks, easy to remove if I get a stereo radio or radio panel. To increase my chances of having a working transmit, I disconnected the audio input jack and the audio out jack.
I got perfect sound, now with the connectors fully in. People were reading me 5/5 on the ground, no time for a flight test today. Hopefully I will make the next flight this Friday.
I did find another problem, I could not use push to talk on the left side, my experience for all the problems I have had the last six months tell me that the stick, dsub connector should be the first place to check.
Not so, my wiring was correct, the right wire was connected to the tip, barrel and ring. However, I had connected the jack as a stereo jack, believing that a stereo headset would not care about if you connected the left or right channel to radio. Not so, my headset seems to request that it gets an input on the tip/right channel.
I solved this by making a wire between the tip and ring on the headset jacks, easy to remove if I get a stereo radio or radio panel. To increase my chances of having a working transmit, I disconnected the audio input jack and the audio out jack.
I got perfect sound, now with the connectors fully in. People were reading me 5/5 on the ground, no time for a flight test today. Hopefully I will make the next flight this Friday.
I did find another problem, I could not use push to talk on the left side, my experience for all the problems I have had the last six months tell me that the stick, dsub connector should be the first place to check.
7/24/19
Flight 6 observer on board
After 5.2 mechanically trouble free hours I felt that it was ok to bring on another person in the plane. My wife is an approved observer for the test period. This was a flight to familiarize her with the AC and also to test the intercom.
My intercom does not work! there is a loop in them making the sound become louder and louder... we had to remove our headsets and turn off the intercom. Something is still wrong with my headset wiring.
Another not so good landing :/
Flew with 90% power for a while, topped out at 178 kt indicated in level flight!
My intercom does not work! there is a loop in them making the sound become louder and louder... we had to remove our headsets and turn off the intercom. Something is still wrong with my headset wiring.
Another not so good landing :/
Flew with 90% power for a while, topped out at 178 kt indicated in level flight!
7/23/19
Flight 5, touchdown video
Of course I made my first bounce when I finally got a touch down on video. But promise is promise so here you have it, the second "landing" was pretty much a spot on 3-pointer ;)
I reinstalled my headset connectors, making sure that they are isolated, made a radio check with the tower and got a "reading you 5". All was also well during taxi and take off but when returning tower reported "3 with a lot of static". So not done with this problem yet!
I reinstalled my headset connectors, making sure that they are isolated, made a radio check with the tower and got a "reading you 5". All was also well during taxi and take off but when returning tower reported "3 with a lot of static". So not done with this problem yet!
7/22/19
Flight 4
Lots of travel today. My wife and kids are staying at my in-laws summer house for another night or two, I got dropped of at a train station. Two train rides followed by two subway rides, one commuter train. another subway and then a 15 minute walk and I was home, 4:20 in total, ate lunch and then drove to the airport...
Removed the cowl and checked all connections in front of the FW, all still good and no new stains.
Tested if the manifold pressure sensor got power... no it did not! Checked the connector at the GEA24, the one I suspected would be bad... nope. Checked the other side, did not solve it, it was the actual wire that had broken. I made a new wire, routed it in another way and with a good slack between anything that could move. I got MP reading again!
On the ground I got reasonable transmissions and the time was after 20:20 so I decided to fly again, very low cloud base but I am already comfortable in my RV. Another hour in the air. After looking at the Savvy video Savvy, Breaking Good I decided to run the engine even harder, for about 30 minutes I ran it at 86%. Temps are great but I have not seen any definitive drop in the low CHTs yet.... the oil consumption is already low, is the break in done? I will run it hard a little longer.
One item of the list, no new problems. Might get time to investigate the com problem tomorrow :D
Take off number 4, I promise to film a landing at the next flight, I just cannot get a real 3-pointer, would like to se how far away the tail wheel is.
Removed the cowl and checked all connections in front of the FW, all still good and no new stains.
Tested if the manifold pressure sensor got power... no it did not! Checked the connector at the GEA24, the one I suspected would be bad... nope. Checked the other side, did not solve it, it was the actual wire that had broken. I made a new wire, routed it in another way and with a good slack between anything that could move. I got MP reading again!
On the ground I got reasonable transmissions and the time was after 20:20 so I decided to fly again, very low cloud base but I am already comfortable in my RV. Another hour in the air. After looking at the Savvy video Savvy, Breaking Good I decided to run the engine even harder, for about 30 minutes I ran it at 86%. Temps are great but I have not seen any definitive drop in the low CHTs yet.... the oil consumption is already low, is the break in done? I will run it hard a little longer.
One item of the list, no new problems. Might get time to investigate the com problem tomorrow :D
Take off number 4, I promise to film a landing at the next flight, I just cannot get a real 3-pointer, would like to se how far away the tail wheel is.
7/19/19
Testflight 2&3
Yesterday I removed the cowling and checked all wires and connections. Everything looked good and there was no new oil stains from the first flight. I now cleaned off the stains that came from the first engine start. In the evening I performed two more flights.
The first flight consumed less than 1/2 quarts of oil. Here is "the inside view" from the first flight.
I now have 3.2 hours airborne. There are two big squaks:
1. My radio transmissions are almost unreadable, I tried adjusting mic gain but now suspect a physical wiring problem most likely a short to ground at the headset connectors.
2. I lost manifold pressure reading! As I know what the fuel flow should be for 2500rpm and 75-80%, I continued the last flight as planned without MP reading.
All in all am am very happy but the above problems must be fixed before flight 4. The engine uses less than 0.5 quarts per hour and temps are very good. Unfortunately I forgot to take or copy the logs from the SD card so I do not have any data from flight 2&3 yet.
The first flight consumed less than 1/2 quarts of oil. Here is "the inside view" from the first flight.
I now have 3.2 hours airborne. There are two big squaks:
1. My radio transmissions are almost unreadable, I tried adjusting mic gain but now suspect a physical wiring problem most likely a short to ground at the headset connectors.
2. I lost manifold pressure reading! As I know what the fuel flow should be for 2500rpm and 75-80%, I continued the last flight as planned without MP reading.
All in all am am very happy but the above problems must be fixed before flight 4. The engine uses less than 0.5 quarts per hour and temps are very good. Unfortunately I forgot to take or copy the logs from the SD card so I do not have any data from flight 2&3 yet.
7/17/19
No, yes, maybe, no, yes!
Woke up to a low cloud base and rain! Checked the forecast several times before lunch, it looked like there could be a 3 hour break. Of to the airport and after a hopeless hour I refueled but put the RV back into the hangar, the chances of flying was very slim.
Installed my now overhauled 35R and it started looking better again. As there was so little traffic I decided that I did not need a dependable 4000 feet cloud base, an initial cloud base of 3000 and a worst case scenario for landing at 1500 would be enough.
Of I went. For the first hour I could fly at between 4000 and 2500 feet AGL and for the last 30 min at 2000-2500.
The only real squawk was that my com transmit became worse as the flight continued. I could hear everyone else fine but they got lots of static from me. After 30 minutes of bad coms I decided that 1:30 airborne would have to be enough for the first flight.
I will try to make a better movie later on, all onboard GoPros was out of power after about an hour so no onboard media from the landing.
Vans will be notified tomorrow :D
Installed my now overhauled 35R and it started looking better again. As there was so little traffic I decided that I did not need a dependable 4000 feet cloud base, an initial cloud base of 3000 and a worst case scenario for landing at 1500 would be enough.
Of I went. For the first hour I could fly at between 4000 and 2500 feet AGL and for the last 30 min at 2000-2500.
The only real squawk was that my com transmit became worse as the flight continued. I could hear everyone else fine but they got lots of static from me. After 30 minutes of bad coms I decided that 1:30 airborne would have to be enough for the first flight.
I will try to make a better movie later on, all onboard GoPros was out of power after about an hour so no onboard media from the landing.
Vans will be notified tomorrow :D
7/14/19
Closing in
Today I prepared for the new manifold pressure sensor.
I disconnected everything and laid out tools and parts for a quick installation of the new sensor as soon as it arrives. I took some pictures of the removed sensor, more on this later.
Then performed several task that are not really necessary for the first flight but nice to have, I mounted two RAM balls for a camera and phone/tablet on the left side of the panel. I put one GoPro mount on each wing and cleaned up the wiring some.
When I got home I looked at the picture of the removed sensor and discovered that it was a P4055-5025-3 sensor. That is for fuel pressure, not manifold pressure! So the question is now, did I mix up these sensors and is my manifold pressure sensor sitting where it measures oil or fuel pressure?
I disconnected everything and laid out tools and parts for a quick installation of the new sensor as soon as it arrives. I took some pictures of the removed sensor, more on this later.
Then performed several task that are not really necessary for the first flight but nice to have, I mounted two RAM balls for a camera and phone/tablet on the left side of the panel. I put one GoPro mount on each wing and cleaned up the wiring some.
When I got home I looked at the picture of the removed sensor and discovered that it was a P4055-5025-3 sensor. That is for fuel pressure, not manifold pressure! So the question is now, did I mix up these sensors and is my manifold pressure sensor sitting where it measures oil or fuel pressure?
7/11/19
Frustrating
So I have had all needed permit since almost a week now. There is only one "show stopper" preventing the first flight:
- my manifold pressure sensor does not work. After trouble shooting for several hours including completely rewiring the connection, I have given up on it and have ordered a new sensor.
My faulty transponder is still travelling to the retailer but that will/would not prevent me from making a first flight in uncontrolled airspace. Pretty sure I will not fly this weekend, I think Tuesday the 16th is the first realistic possibility for the first flight :/
- my manifold pressure sensor does not work. After trouble shooting for several hours including completely rewiring the connection, I have given up on it and have ordered a new sensor.
My faulty transponder is still travelling to the retailer but that will/would not prevent me from making a first flight in uncontrolled airspace. Pretty sure I will not fly this weekend, I think Tuesday the 16th is the first realistic possibility for the first flight :/
7/4/19
One of three still needed permits received
I just got a copy of my "Certificate of registration" and information on that the original is in the mail. this also means that my two other remaining permits are on its way.
To be allowed to fly I also need the flight test permit for the aircraft and the radio license. I do not think that I will get up in the air this weekend even if I get the permits on time, to many other activities planned. But sometime next week if the weather cooperates. :)
To be allowed to fly I also need the flight test permit for the aircraft and the radio license. I do not think that I will get up in the air this weekend even if I get the permits on time, to many other activities planned. But sometime next week if the weather cooperates. :)
7/2/19
Expecting permits any day now
I should receive all needed permits any time now. While waiting I am performing smaller improvements. Today I started exchanging some of the EGT/CHT sensor wiring. I had mixed the HI/LO wires and when starting to solve the problem I just decided that the cables are to short.
My transponder is on recalibration/repair/exchange so currently I am limited to days/time when the airport is closed and thre is uncontrolled airspace up to 4500 feet. Next slots that also fits my calendar are early on Saturday or next Tuesday evening...
I have one new/remaining show stopper, my manifold pressure sensor is not working.


My transponder is on recalibration/repair/exchange so currently I am limited to days/time when the airport is closed and thre is uncontrolled airspace up to 4500 feet. Next slots that also fits my calendar are early on Saturday or next Tuesday evening...
I have one new/remaining show stopper, my manifold pressure sensor is not working.


6/26/19
Where is my camera
Mixed feelings about today. One big negative was that I took no pictures from the visit to the airport. The biggest plus was that my kids behaved fantastic, filling up the RV at the pumps, calibrating the EFIS-Fuel pump senders with a 4 and 6 year old around worked great!
After refueling I tested cycling the prop. It worked already on the second try. Did one more to verify and then taxied to the hangar and shut down. This was my first longer taxi, the visibility is great even for a short guy like me. Stearing the RV-14 during slow taxi is very easy.
The list
New:
- Used a to long screw while attaching the upper leg fairing resulting in that I unbonded the glassed in nut.
- Do something about the EGT/CHT and more wiring, I had no reading during the taxi today
Done:
- Finish the paper work (Now very likely)
- Paint the last three letters of the registration marks (the vinyl came loose)
- Wire the elevator trim correctly
- make the flap switch move the flaps in the right direction
- Rewire the magnetometer
- Re-calibrate the magnetometer
- Validate all G3X green/yellow/red band settings
- Attach the wing walk spacers with the proper hardware
- Proof of Insurance, not sure what if anything was actually wrong but my insurance agent will send a new copy to the authorities.
- Corrected ELT information. I had mistakenly filled out the 15 digit HEX "serial number" of my ELT and not the 15 digit HEX ID number. After spending more than three hours searching for the documentation it was an easy fix. Turns out that I have posh looking folder for important RV documentation that I had forgot about ;)
- Prop cycle
- Verify/redo fuel tank sender calibration
Remaining:
- Solve the right stick trim down button not working
- Connect the landing light
- Get the transponder working (Sent it via DHL today)
- Fix the right upper gear fairing, glassed it in tonight, sanding planned for tomorrow
- Do something about the EGT/CHT and more wiring
- Another engine run with proper EGT/CHT reading and a short full power run.
Other things to be done soon but not necessary before first flight:
- Install aileron trim
- Install autopilot servos
- Install tablet holder
After refueling I tested cycling the prop. It worked already on the second try. Did one more to verify and then taxied to the hangar and shut down. This was my first longer taxi, the visibility is great even for a short guy like me. Stearing the RV-14 during slow taxi is very easy.
The list
New:
- Used a to long screw while attaching the upper leg fairing resulting in that I unbonded the glassed in nut.
- Do something about the EGT/CHT and more wiring, I had no reading during the taxi today
Done:
- Finish the paper work (Now very likely)
- Paint the last three letters of the registration marks (the vinyl came loose)
- Wire the elevator trim correctly
- make the flap switch move the flaps in the right direction
- Rewire the magnetometer
- Re-calibrate the magnetometer
- Validate all G3X green/yellow/red band settings
- Attach the wing walk spacers with the proper hardware
- Proof of Insurance, not sure what if anything was actually wrong but my insurance agent will send a new copy to the authorities.
- Corrected ELT information. I had mistakenly filled out the 15 digit HEX "serial number" of my ELT and not the 15 digit HEX ID number. After spending more than three hours searching for the documentation it was an easy fix. Turns out that I have posh looking folder for important RV documentation that I had forgot about ;)
- Prop cycle
- Verify/redo fuel tank sender calibration
Remaining:
- Solve the right stick trim down button not working
- Connect the landing light
- Get the transponder working (Sent it via DHL today)
- Fix the right upper gear fairing, glassed it in tonight, sanding planned for tomorrow
- Do something about the EGT/CHT and more wiring
- Another engine run with proper EGT/CHT reading and a short full power run.
Other things to be done soon but not necessary before first flight:
- Install aileron trim
- Install autopilot servos
- Install tablet holder
 |
| All that can be done at home... |
6/24/19
Two added and the same two removed today
The list
New:
- Proof of Insurance, not sure what, if anything was actually wrong but my insurance agent will send a new copy to the authorities.
- Corrected ELT information. I had mistakenly filled out the 15 digit HEX "serial number" of my ELT and not the 15 digit HEX ID number. After spending more than three hours searching for the documentation it was an easy fix. Turns out that I have a posh looking folder for important RV documentation that I had forgotten about ;)
Done:
- Finish the paper work (Now very likely)
- Paint the last three letters of the registration marks (the vinyl came loose)
- Wire the elevator trim correctly
- make the flap switch move the flaps in the right direction
- Rewire the magnetometer
- Re-calibrate the magnetometer
- Validate all G3X green/yellow/red band settings
- Attach the wing walk spacers with the proper hardware
- Proof of Insurance, not sure what if anything was actually wrong but my insurance agent will send a new copy to the authorities.
- Corrected ELT information. I had mistakenly filled out the 15 digit HEX "serial number" of my ELT and not the 15 digit HEX ID number. After spending more than three hours searching for the documentation it was an easy fix. Turns out that I have posh looking folder for important RV documentation that I had forgot about ;)
Remaining:
- Solve the right stick trim down button not working
- Connect the landing light
- Get the transponder working (Sent it via DHL today)
- Verify/redo fuel tank sender calibration
- Another engine run with proper EGT/CHT reading, prop cycle and a short full power run.
Other things to be done soon but not necessary before first flight:
- Install aileron trim
- Install autopilot servos
- Install tablet holder
New:
- Proof of Insurance, not sure what, if anything was actually wrong but my insurance agent will send a new copy to the authorities.
- Corrected ELT information. I had mistakenly filled out the 15 digit HEX "serial number" of my ELT and not the 15 digit HEX ID number. After spending more than three hours searching for the documentation it was an easy fix. Turns out that I have a posh looking folder for important RV documentation that I had forgotten about ;)
Done:
- Finish the paper work (Now very likely)
- Paint the last three letters of the registration marks (the vinyl came loose)
- Wire the elevator trim correctly
- make the flap switch move the flaps in the right direction
- Rewire the magnetometer
- Re-calibrate the magnetometer
- Validate all G3X green/yellow/red band settings
- Attach the wing walk spacers with the proper hardware
- Proof of Insurance, not sure what if anything was actually wrong but my insurance agent will send a new copy to the authorities.
- Corrected ELT information. I had mistakenly filled out the 15 digit HEX "serial number" of my ELT and not the 15 digit HEX ID number. After spending more than three hours searching for the documentation it was an easy fix. Turns out that I have posh looking folder for important RV documentation that I had forgot about ;)
Remaining:
- Solve the right stick trim down button not working
- Connect the landing light
- Get the transponder working (Sent it via DHL today)
- Verify/redo fuel tank sender calibration
- Another engine run with proper EGT/CHT reading, prop cycle and a short full power run.
Other things to be done soon but not necessary before first flight:
- Install aileron trim
- Install autopilot servos
- Install tablet holder
6/23/19
One less on the list.
Spent two hours attaching the wing walk spacers but now that item can be moved to the "done" section. No new squaks identified today :)
The list
New:
- None but I will start on the aileron trim tomorrow, lots can be done at home
Done:
- Finish the paper work (Probably)
- Paint the last three letters of the registration marks (the vinyl came loose)
- Wire the elevator trim correctly
- make the flap switch move the flaps in the right direction
- Rewire the magnetometer
- Re-calibrate the magnetometer
- Validate all G3X green/yellow/red band settings
- Attach the wing walk spacers with the proper hardware
Remaining:
- Solve the right stick trim down button not working
- Connect the landing light
- Get the transponder working (Filled out the warranty claim today)
- Verify/redo fuel tank sender calibration (would have been done today but it kept raining)
- Another engine run with proper EGT/CHT reading, prop cycle and a short full power run. (would have been done today but it kept raining)
Other things to be done soon but not necessary before first flight:
- Install aileron trim
- Install autopilot servos
- Install tablet holder
The list
New:
- None but I will start on the aileron trim tomorrow, lots can be done at home
Done:
- Finish the paper work (Probably)
- Paint the last three letters of the registration marks (the vinyl came loose)
- Wire the elevator trim correctly
- make the flap switch move the flaps in the right direction
- Rewire the magnetometer
- Re-calibrate the magnetometer
- Validate all G3X green/yellow/red band settings
- Attach the wing walk spacers with the proper hardware
Remaining:
- Solve the right stick trim down button not working
- Connect the landing light
- Get the transponder working (Filled out the warranty claim today)
- Verify/redo fuel tank sender calibration (would have been done today but it kept raining)
- Another engine run with proper EGT/CHT reading, prop cycle and a short full power run. (would have been done today but it kept raining)
Other things to be done soon but not necessary before first flight:
- Install aileron trim
- Install autopilot servos
- Install tablet holder
6/20/19
The list
Starting to complete the last items:
New:
- Finish the paper work
- Paint the last three letters of the registration marks (the vinyl came loose)
- Solve the right stick trim down button not working (Once I got the trim wiring figured out I found this new issue)
Done:
- Finish the paper work (Probably)
- Paint the last three letters of the registration marks (the vinyl came loose)
- Wire the elevator trim correctly
- make the flap switch move the flaps in the right direction
- Rewire the magnetometer
- Re-calibrate the magnetometer
- Validate all G3X green/yellow/red band settings
Remaining:
- Solve the right stick trim down button not working
- Connect the landing light
- Get the transponder working (Filled out the warranty claim today)
- Verify/redo fuel tank sender calibration (would have been done today but it kept raining)
- Attach the wing walk spacers with the proper hardware (Did most of it today, but I did not have the tools to dimple the three holes you match drill)
- Another engine run with proper EGT/CHT reading, prop cycle and a short full power run. (would have been done today but it kept raining)
Other things to be done soon but not necessary before first flight:
- Install aileron trim
- Install autopilot servos
- Install tablet holder
I sounds like I can expect my temporary permit to fly next week :) That would be amazing!
New:
- Finish the paper work
- Paint the last three letters of the registration marks (the vinyl came loose)
- Solve the right stick trim down button not working (Once I got the trim wiring figured out I found this new issue)
Done:
- Finish the paper work (Probably)
- Paint the last three letters of the registration marks (the vinyl came loose)
- Wire the elevator trim correctly
- make the flap switch move the flaps in the right direction
- Rewire the magnetometer
- Re-calibrate the magnetometer
- Validate all G3X green/yellow/red band settings
Remaining:
- Solve the right stick trim down button not working
- Connect the landing light
- Get the transponder working (Filled out the warranty claim today)
- Verify/redo fuel tank sender calibration (would have been done today but it kept raining)
- Attach the wing walk spacers with the proper hardware (Did most of it today, but I did not have the tools to dimple the three holes you match drill)
- Another engine run with proper EGT/CHT reading, prop cycle and a short full power run. (would have been done today but it kept raining)
Other things to be done soon but not necessary before first flight:
- Install aileron trim
- Install autopilot servos
- Install tablet holder
I sounds like I can expect my temporary permit to fly next week :) That would be amazing!
6/15/19
Inspection passed!
So this week the inspection was done, I have a very short list of to-dos before being formally ready for flight.
I need to mount the needed engraved signs (one has to be from stainless steel), I received earlier this week. I need to put the "Experimental" sign in place. I need to securely fasten the fire extinguisher and that's about it.
Then on my personal show-stopper is:
- Connect the landing light
- Get the transponder working
- Wire the elevator trim correctly
- make the flap switch move the flaps in the right direction
- Rewire the magnetometer (done today)
- Re-calibrate the magnetometer (done today)
- Verify/redo fuel tank sender calibration
- Validate all G3X green/yellow/red band settings
- Attach the wing walk spacers with the proper hardware (I got the needed AN507C832R8 today)
- Another engine run with proper EGT/CHT reading, prop cycle and a short full power run.
Other things to be done soon but not necessary before first flight:
- Install aileron trim
- Install autopilot servos
- Install tablet holder
I need to mount the needed engraved signs (one has to be from stainless steel), I received earlier this week. I need to put the "Experimental" sign in place. I need to securely fasten the fire extinguisher and that's about it.
Then on my personal show-stopper is:
- Connect the landing light
- Get the transponder working
- Wire the elevator trim correctly
- make the flap switch move the flaps in the right direction
- Rewire the magnetometer (done today)
- Re-calibrate the magnetometer (done today)
- Verify/redo fuel tank sender calibration
- Validate all G3X green/yellow/red band settings
- Attach the wing walk spacers with the proper hardware (I got the needed AN507C832R8 today)
- Another engine run with proper EGT/CHT reading, prop cycle and a short full power run.
Other things to be done soon but not necessary before first flight:
- Install aileron trim
- Install autopilot servos
- Install tablet holder
6/9/19
First engine start
Another long day. Started at home, trying to finish the paperwork for the inspection, realized that it would not be possible to be anywhere close to 100% ready. Decided to go to the hangar to get the aircraft ready for inspection.
I have some tasks to do like actually mounting the fire extinguisher, place some markings like "experimental". This will be done and shown via photos to the inspector. The physical inspection went well and we decided to finish up the paperwork part later in the week.
Then it was time to try and start the engine. The first attempts were not successful, we checked and could verify that the engine received fuel... put the battery on the charger and started to trouble shoot. I had a suspicion already while trying to start the engine but I decided to charge the battery first and verify.
I remembered thinking a lot about the mag switches, I fully understand the concept of preventing them to function by grounding them, somehow I anyhow managed to install them up side down! Very embarrassing.
After charging the AC battery it was time for the next try, my GoPro had very little power left, Lars main task was to be ready with the fire extinguisher also filmed with his mobile, this was great as very little of the successful start was recorded by the GoPro.
I did not get any EGT reading and soon also lost CHT so the run was kept very short, ended with a slow lead to check rpm rise, result almost exactly 100 rpm.
Drove home with a great smile on my face during the entire 1:30 trip (some traffic on a Sunday evening)
I have some tasks to do like actually mounting the fire extinguisher, place some markings like "experimental". This will be done and shown via photos to the inspector. The physical inspection went well and we decided to finish up the paperwork part later in the week.
Then it was time to try and start the engine. The first attempts were not successful, we checked and could verify that the engine received fuel... put the battery on the charger and started to trouble shoot. I had a suspicion already while trying to start the engine but I decided to charge the battery first and verify.
I remembered thinking a lot about the mag switches, I fully understand the concept of preventing them to function by grounding them, somehow I anyhow managed to install them up side down! Very embarrassing.
After charging the AC battery it was time for the next try, my GoPro had very little power left, Lars main task was to be ready with the fire extinguisher also filmed with his mobile, this was great as very little of the successful start was recorded by the GoPro.
I did not get any EGT reading and soon also lost CHT so the run was kept very short, ended with a slow lead to check rpm rise, result almost exactly 100 rpm.
Drove home with a great smile on my face during the entire 1:30 trip (some traffic on a Sunday evening)
6/8/19
W&B
Almost 12 hours in the hangar today. Lots of small tasks to be done before bringing out the scales.
First was solving the non-running fuel pump. It turned out that I had not connected the ground, very embarrassing! Fixed that, and performed the fuel flow test as an easy way to get out the fuel from the tanks. Result, it takes just short of 23 seconds to deliver one liter. That is over 156 l/h or more than 41 gallons per hour!
Most things moved along great, one nutplate in the wheel fairings decided to give up and capture the screw. had to drill it out and put in another nutplate.
As I had done the measurements and tested for leveling the AC, the actual test was done in a very short time frame.
 |
| Almost ready to get up on the scales. |
 |
| Recording values |
 |
| So 261.2 kg on the left wheel, 263,4 on the right and 25,2 on the tail wheel. |

 |
| Lst task of the day, had to enlarge the opening some more. |
6/7/19
Lots done w&b tomorrow
Lots done today, took the afternoon off from work.
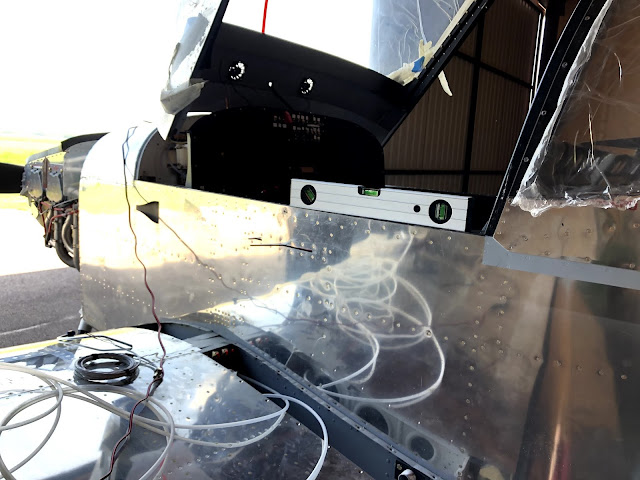
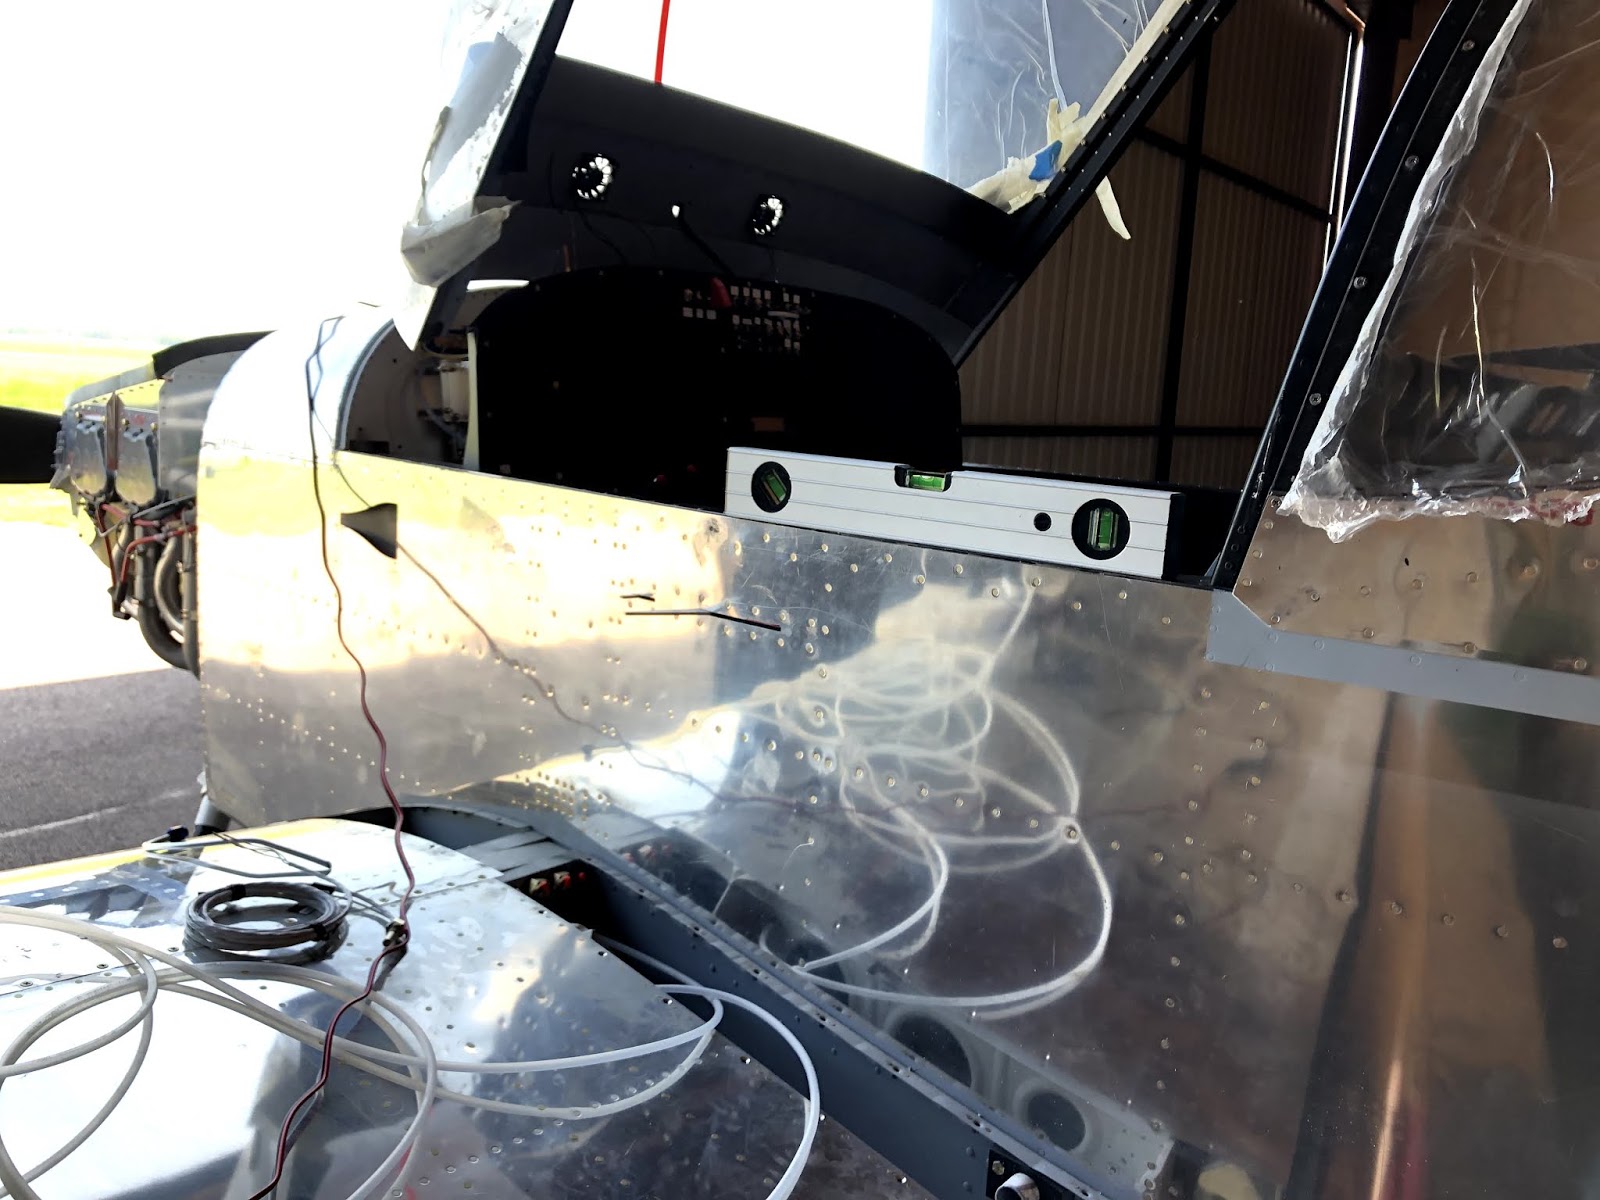
 Arms are measured, close to Vans example so I should be good. Will make another check during the test tomorrow.
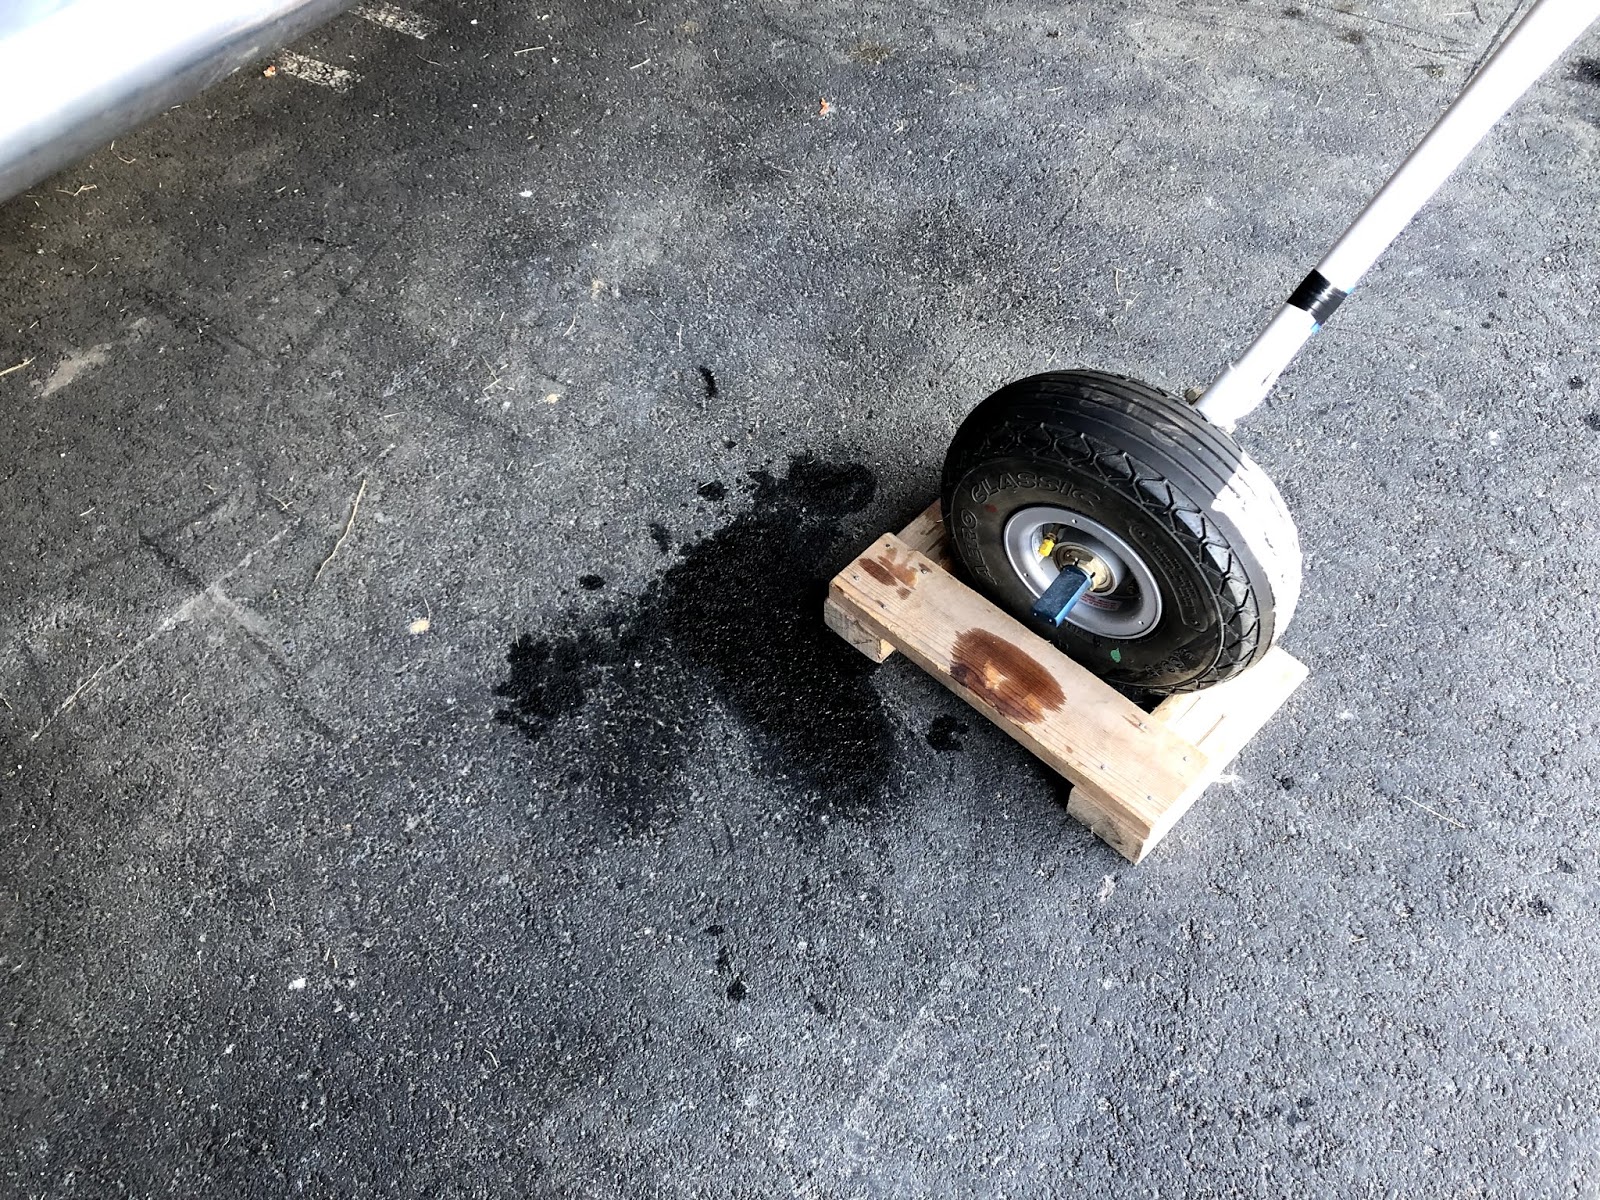
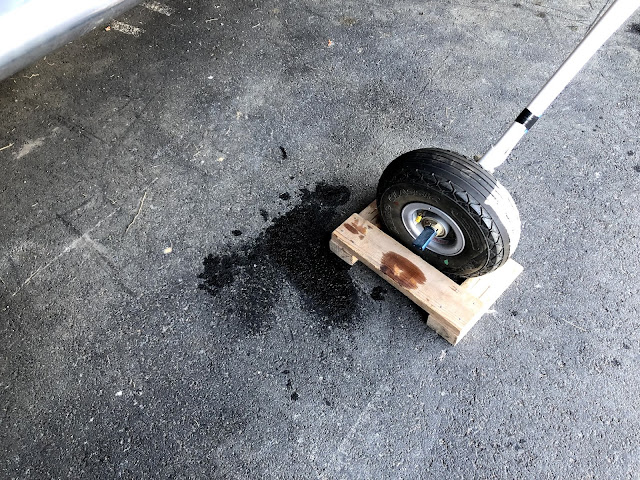 I envy those capable of bleeding breakes without creating a mess, my 2$ pump gave up just as I was finished. Not tested yet but I think I managed to keep air away. Filled from the bottom.
 Removing te cover from the canopy, within seconds there was dust on it.




6/6/19


6/3/19


5/25/19
Good and bad
Another day at the airport.
Got my registration marks painted under the wing, this would have been so much easier to do before the wings was mounted to the airplane!
Getting the washers in place when attaching the elevator controls was difficult, should have done this before mounting the vertical stabilizer. Then the molex connector on the trim wires broke, after reading about others problems with these connectors it was probably for the best that I had to hard wire them instead.


I finished off with testing my nav and strobe lights. All nav lights worked, the strobe worked in the tail and on the left wingtip but not on the right wingtip, to be investigated.
Got my registration marks painted under the wing, this would have been so much easier to do before the wings was mounted to the airplane!
Getting the washers in place when attaching the elevator controls was difficult, should have done this before mounting the vertical stabilizer. Then the molex connector on the trim wires broke, after reading about others problems with these connectors it was probably for the best that I had to hard wire them instead.


I finished off with testing my nav and strobe lights. All nav lights worked, the strobe worked in the tail and on the left wingtip but not on the right wingtip, to be investigated.
5/23/19
Tail attachment 1
Oldest had no school today so we had a great day at the airport. I managed to lend a lorry from work, solving the problem of transporting the stabilizer that would not fit into a car.


After a long day I was ready to go home, my son then asked if we could fly! There is only one answer to that!
 We flew over our to be house, our groundwork should start in a few weeks.


After a long day I was ready to go home, my son then asked if we could fly! There is only one answer to that!

5/18/19
Wing torque, flaps
I need to find a way to get to the aircraft more often!
I attached the bolt that connect the back part of the wings and then torqued all wing bolts. I used about 170 and 820 inch pounds.
Then I attached the little fuel line from the tanks to the fuselage. After that I managed to connect the flap actuation. My flap motor runs in the wrong way, I will deal with that later.
Final task was checking my com radio, I could here coms but with very low volume. Hopefully just a configuration problem.


I attached the bolt that connect the back part of the wings and then torqued all wing bolts. I used about 170 and 820 inch pounds.
Then I attached the little fuel line from the tanks to the fuselage. After that I managed to connect the flap actuation. My flap motor runs in the wrong way, I will deal with that later.
Final task was checking my com radio, I could here coms but with very low volume. Hopefully just a configuration problem.


5/11/19
Wings
Another milestone. Wings are attached (not all bolts are in and no torque on any nuts)
I arrived at the airport early, unpacked some tools and supplies and then started working. First was removing the cowling again, the upper pins really caused trouble this time, must use better lube the next time.
Next was removing the lower spark plugs and letting out the preservative oil. Almost nothing came out of cylinder 2-4 but a lot from cylinder 1. Next was removing the oil, about 1/2 quart came out. Filled with 7 quarts of straight mineral oil.
Removed the plastics from the propeller, connected the main battery and rolled out the RV from the hangar. Now several EAA members started showing up, ran the starter motor with the lower plugs still out, almost no oil pressure on the first run but after letting the engine cool, I got pressure on the second 10-second run with the starter.
I had not gotten hold of or been able to manufacture any drift pins so I had not planned to install the wings today but with all helping hands around, I found two old worn 3/8 bolts and sanded them slightly and trial fitted them on the RV and lubed everything with grease.
Then we got to work, being five people it was surprisingly easy to get the bolts in, what I consider mild tapping with a plastic hammer while the others wiggled the wings was enough.
A big thank you to all who showed up!


I arrived at the airport early, unpacked some tools and supplies and then started working. First was removing the cowling again, the upper pins really caused trouble this time, must use better lube the next time.
Next was removing the lower spark plugs and letting out the preservative oil. Almost nothing came out of cylinder 2-4 but a lot from cylinder 1. Next was removing the oil, about 1/2 quart came out. Filled with 7 quarts of straight mineral oil.
Removed the plastics from the propeller, connected the main battery and rolled out the RV from the hangar. Now several EAA members started showing up, ran the starter motor with the lower plugs still out, almost no oil pressure on the first run but after letting the engine cool, I got pressure on the second 10-second run with the starter.
I had not gotten hold of or been able to manufacture any drift pins so I had not planned to install the wings today but with all helping hands around, I found two old worn 3/8 bolts and sanded them slightly and trial fitted them on the RV and lubed everything with grease.
Then we got to work, being five people it was surprisingly easy to get the bolts in, what I consider mild tapping with a plastic hammer while the others wiggled the wings was enough.
A big thank you to all who showed up!


5/5/19
The big move
Some pictures from the hectic days before the big move, lots of last minute tasks to be done:



 The ride went well, it was a three hour drive home, I got a great discount for basically transporting the truck to the next customer. It was a good way to get to know the handling before having precious cargo in it!
Finally parked at home:
 The train delay meant that I arrived home way to late for preparing anything on the night before the transport as planned. So in the morning I started opening up the shop.


 Then my father and father in law arrived for helping me load the RV onto the truck.


 My wife managed to help a lot while keeping track of the kids at the same time :)


 The cargo space had about 1 inch in total divided by the two sides as clearance. I had to dismount the wheel pant attachment points to make it fit. The entrance to the cargo hold was 1.5 inch tighter so we could not just roll it straight in.

 The next problem was that the cargo hold had absolutely zero low attach points so my thought out plan on how to secure the RV went into the trash bin. I basically used every wooden board I had and all my 2x4s to secure it. I did not look pretty but I can now say that it worked! Unfortunately I do not have a single picture of it secured :(
 Ready to drive
 The boys loved the ride, they slept for more than half of the 1,5 hour drive. My as always fantastic wife took the car and meet up with us at the airport delivering hamburgers for lunch.

 Unloading with the help of my wife and EAA controller Jan-Erik, thanx!


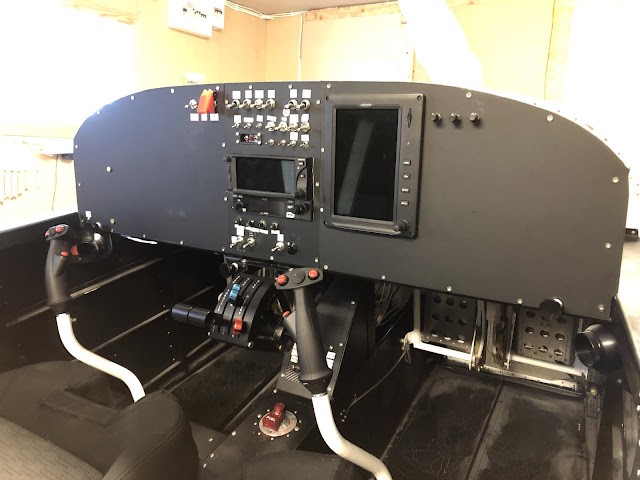
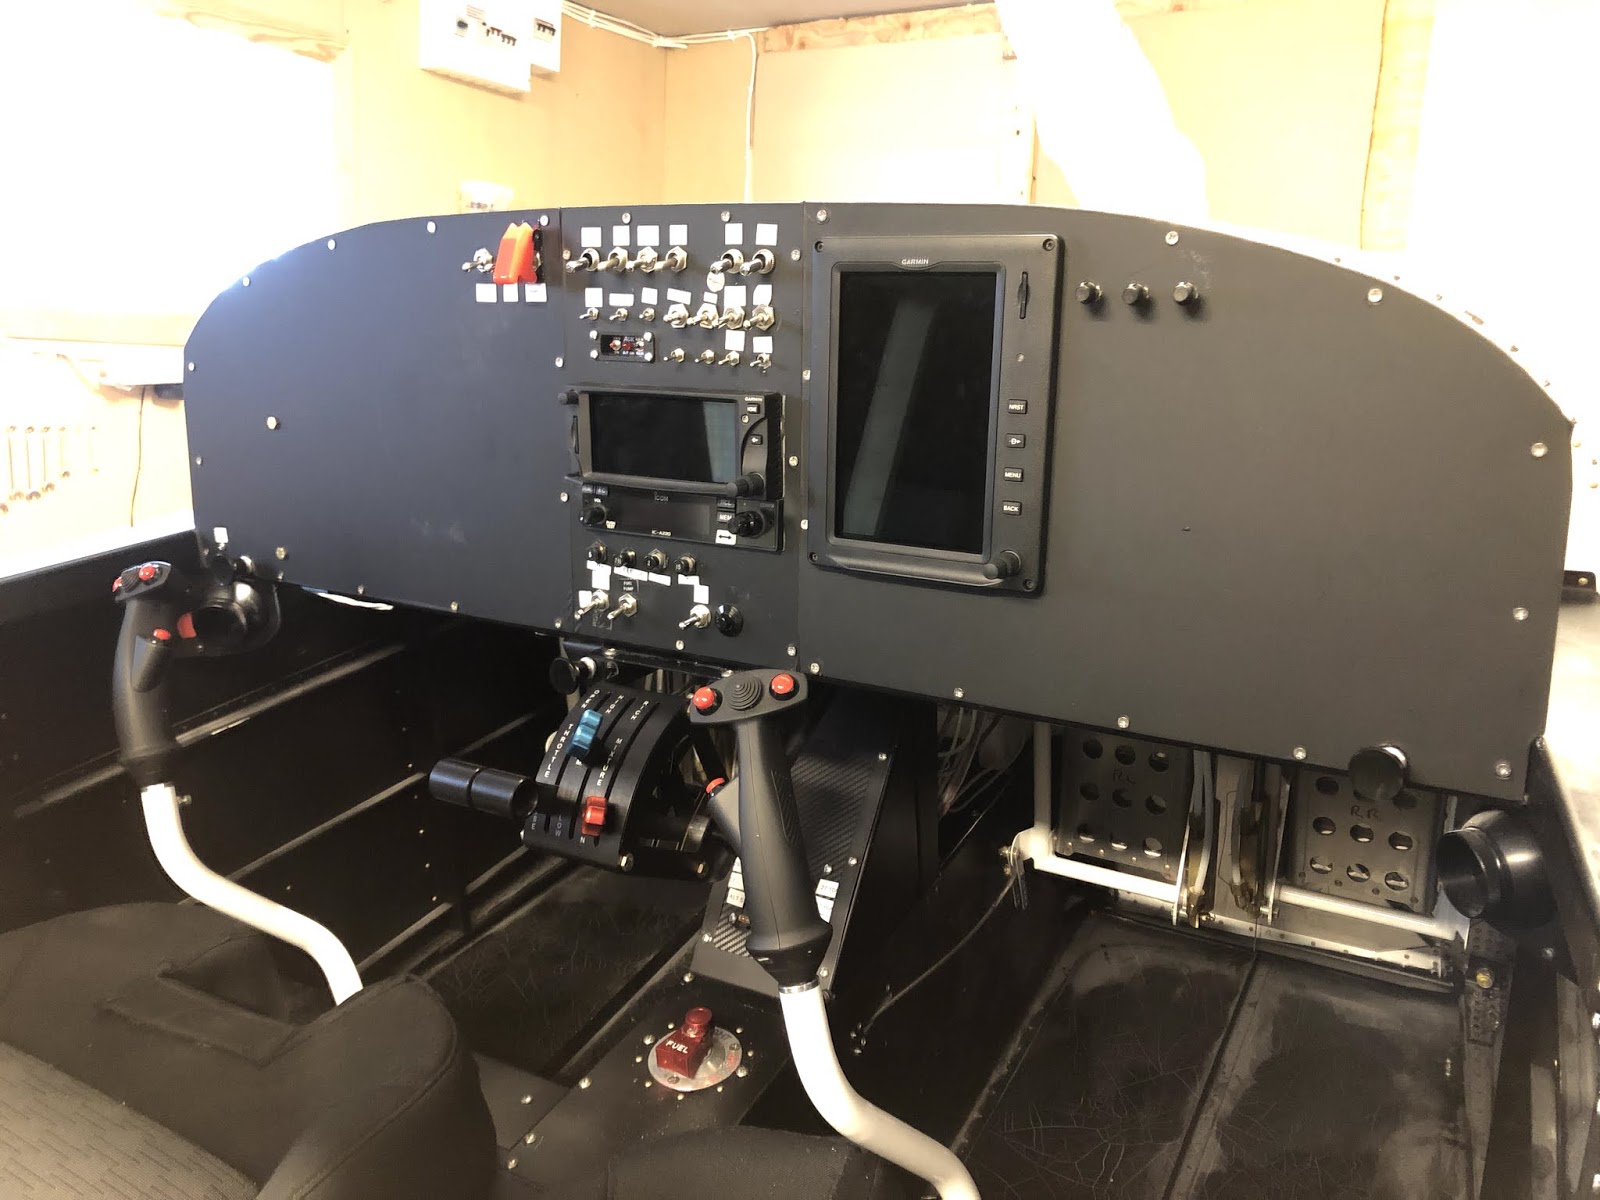
Panel Version 1
Then it was time to rent a truck, unfortunately winter has returned and my train to the destination was delayed so I had to drive in snowfall and darkness.


Finally parked at home:


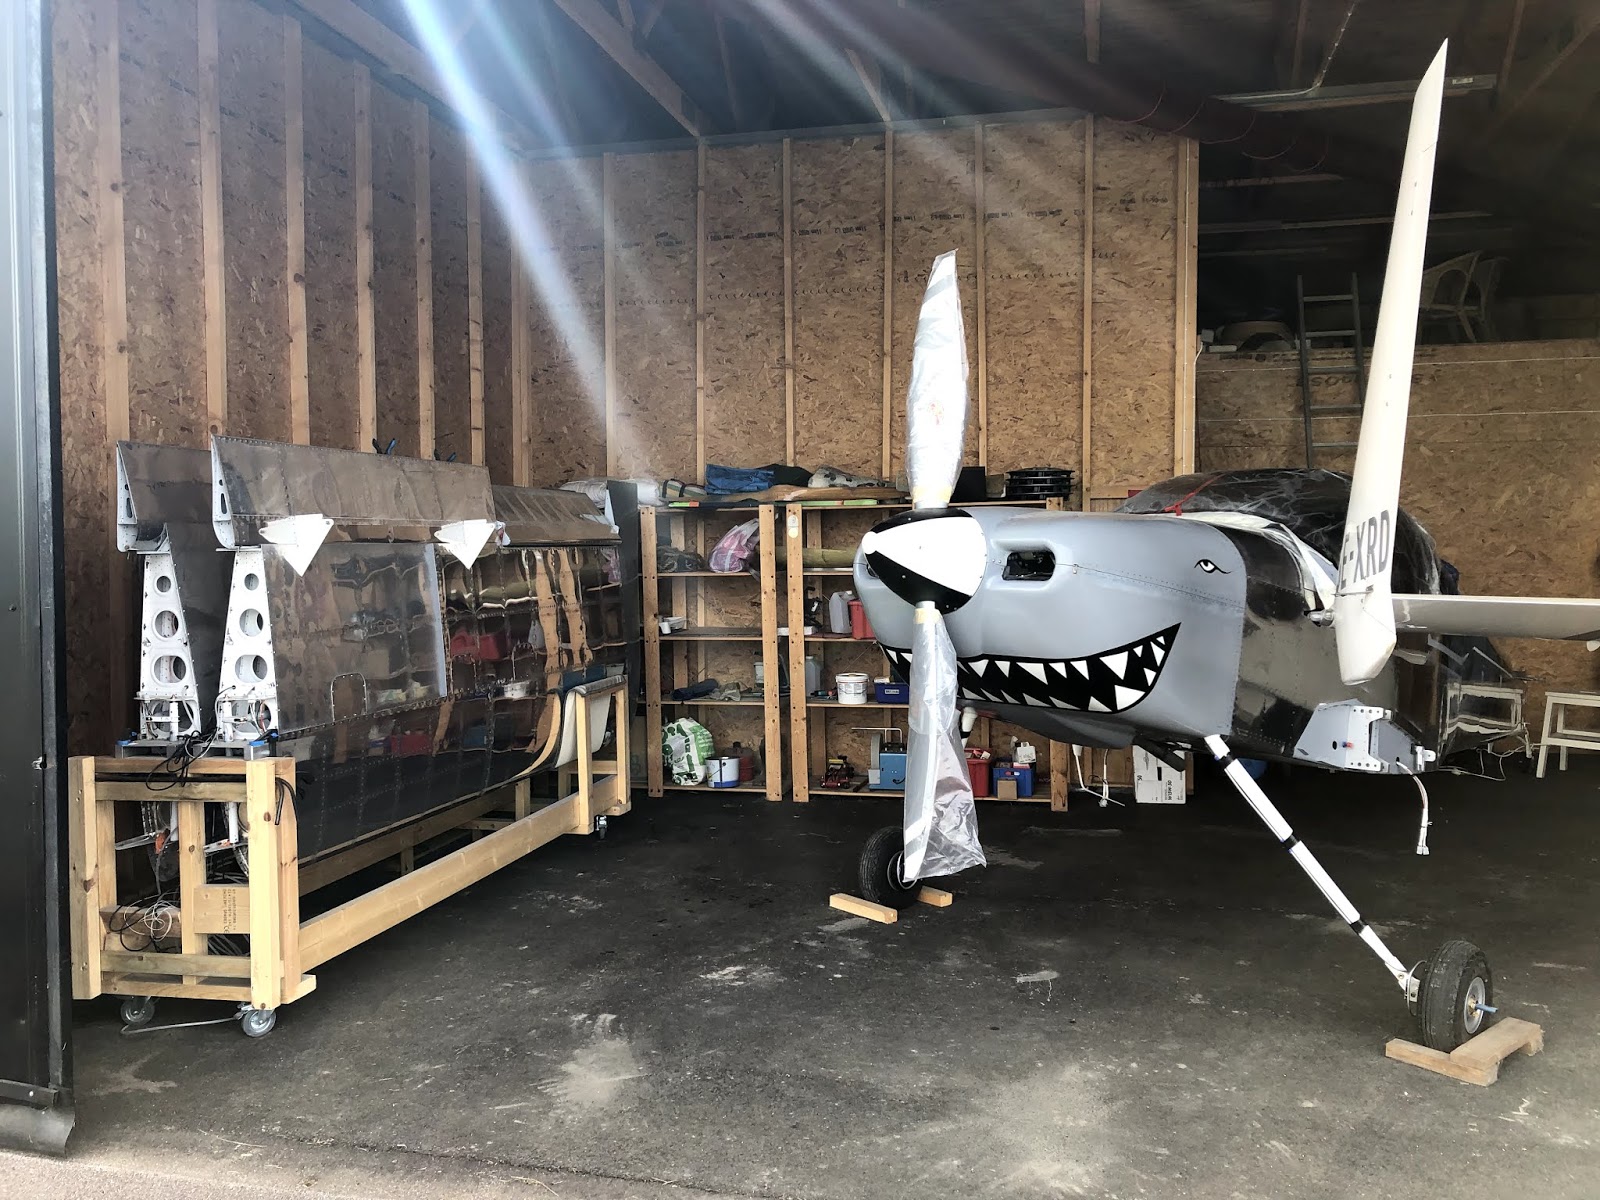
Safe in what will be the new home for 1-3 months
Subscribe to:
Posts (Atom)