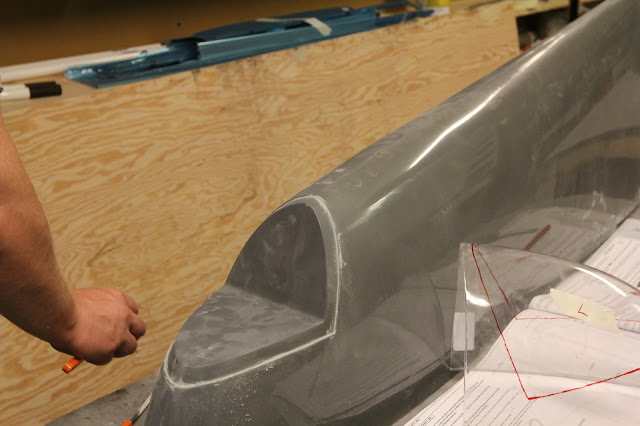
Did I really say that I was done trimming the wing tips? Not so, after putting them on the wings I determined that the edges interfered with the fitting. So more dust!
8/31/16
8/30/16
Lenses trimmed
No pictures :/ But the lenses are trimmed. Now I wait for special drill bits that I ordered from Cleavelandtools, last night they were in Copenhagen so they might show up today.
8/26/16
Wing tip lenses, continued
I like trimming the lenses but it is a bit scary as even the tiniest imperfection on these parts will be very visible on the finished aircraft. I think the memory card I have been using has to go, I could only save a few pictures from tonight's session.
8/25/16
Wing tip lens cut in half and trimming of the wing tip done
I think I am done with the wing tip trimming and I have cut the lens into the two halves and attached them on the wing tips for measurement.
8/23/16
Fiberglass, competing with proseal as being terrible
The reason it looses has more to do with the time than how it is to work with. I was stupid and cut the wing tips with the vibrating saw, wearing a short sleeve shirt. Now it itches even after taking a shower :(
8/16/16
Done for now with chapter 23, Aileron actuation
Started with torquing a lot of nuts, then I performed the two actions needed to make all neutral position correct on both wings.
First one does the "Forward torque tube assembly", It was almost correct from start, on the left wing I needed to turn the rod end bearing half a turn and on the right wing it was perfect without any adjustments.
Then it was time to make sure that the actual ailerons were in a neutral position when the actuation system is so. That took 2.5 turns (one and 1.5 turns on respective sides of the "bellcrank to Aileron pushrod") For the right wing I had to make 4,5 turns in total.
As I will probably remove the rods (being careful not to let any rod end bearings turn) for riveting the bottom skins on, I have not torqued all nuts.
8/15/16
More aileron actuation
Adjusting with washers to align the torque tube assembly. This was a fun session, some tinkering and a pleasant amount of brain workout for an evening tired mind.
8/12/16
Section 19 done
Chapter 19, wing system routing was almost completed long ago.
After installing the tanks, I went thru the manual and found that chapter 19 was not marked as completed. I quickly found that what was left to do was to connect the fuel senders to the wire harness.
After installing the tanks, I went thru the manual and found that chapter 19 was not marked as completed. I quickly found that what was left to do was to connect the fuel senders to the wire harness.
8/8/16
8/6/16
Tanks almost attached
I have done some sessions during the last days but it has just been cleaning out threads and screwing in screws and bolts. Thank god for electrical screwdrivers.
Later I will finish of using the correct moment/torque for the bolts
Later I will finish of using the correct moment/torque for the bolts
Subscribe to:
Comments (Atom)


